
Happy New Year everyone.
This is the fourth and final part of my multi-part blog series on ‘Building an NSX-T Bring Your Own Topology (BYOT) for VMware Enterprise PKS’. In case you missed the previous parts, here are the links:
Here are the contents of this article:
- Deploying the Enterprise PKS Management Console OVA
- Configuring Enterprise PKS Management Console and presenting NSX-T BYOT for consumption
- Deploying Enterprise PKS
Let’s get started
Deploying the Enterprise PKS Management Console OVA
Enterprise PKS Management Console comes as an OVA virtual appliance. This is imported and deployed on the ‘Shared Management and Edge Cluster’ on the vSphere DVS Management VLAN (VLAN 105). The PKS Management and Control plane VMs deployed from the Enterprise PKS Management console sits on the Shared AZ01 and on the Overlay Tier1 Management Network (192.168.101.0/24 non-routable)
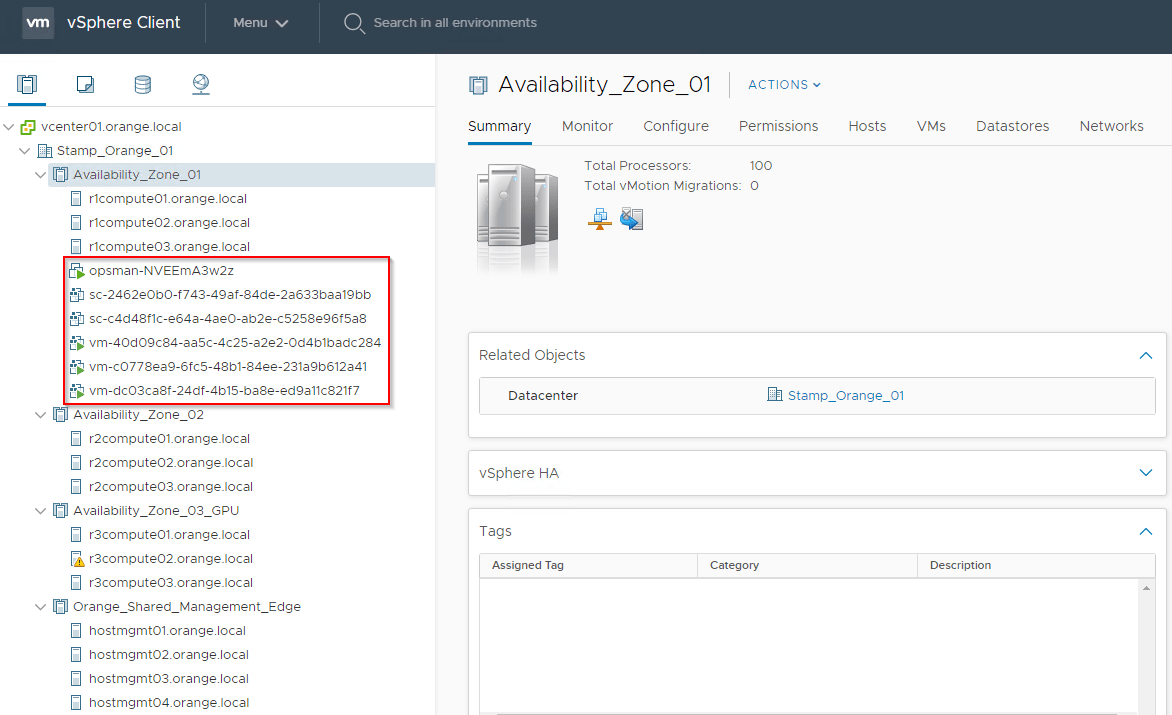
This is how the vCenter clusters look like:

Deployment of Enterprise PKS Management Console is same like importing any other OVA appliances to vCenter. The procedure is available in the Pivotal documentation below:
https://docs.pivotal.io/pks/1-6/console/deploy-console-ova.html
Also have a look at the pre-requisites, we have already met them in Parts 1, 2 & 3 though.
https://docs.pivotal.io/pks/1-6/console/ova-deployment-prereqs.html
Enterprise PKS Management Console deploys the below PKS Components:
- Deploys Pivotal Ops Manager (VM)
- Deploys BOSH Director (VM)
- Deploys Enterprise PKS (VM)
- Deploys Harbor Registry (VM)
- Stem cells (which are templates to build the PKS VMS)
- Configures networking for Enterprise PKS (NSX-T or Flannel). We used NSX-T BYOT here which is presented for Consumption.
Configuring Enterprise PKS Management Console and presenting NSX-T BYOT for Consumption
It’s good to read through the pre-requisites for NSX-T BYOT in the Pivotal documentation below. We have already met this in our configuration in Parts 1, 2 & 3.
https://docs.pivotal.io/pks/1-6/console/prereqs-nsxt-byot.html
A detailed step-by-step procedure is already available in the Pivotal documentation below, we will do a quick walkthough here:
https://docs.pivotal.io/pks/1-6/console/deploy-ent-pks-wizard.html
PKS Management Console is available on WebUI port 80. Once the PKS Management Console OVA is deployed successfully, navigate to it’s WebUI and Click ‘Install’.

Review the deployment prerequisites and click ‘Start Configuration’.

Connect to the vCenter instance (IaaS Platform)

Under Networking, select ‘NSX-T Bring Your Own Topology’. Connect to NSX-T Manager. Select the PKS Management network, POD Network, K8S Node network and Floating Pool ranges that we have already defined. Select NAT mode because the PKS management network is on a non-routable subnet.

Select the Authentication Provider. It could be local UAA, LDAP or SAML depending upon the environment. In our case, we used the Integrated UAA available with the PKS API VM.

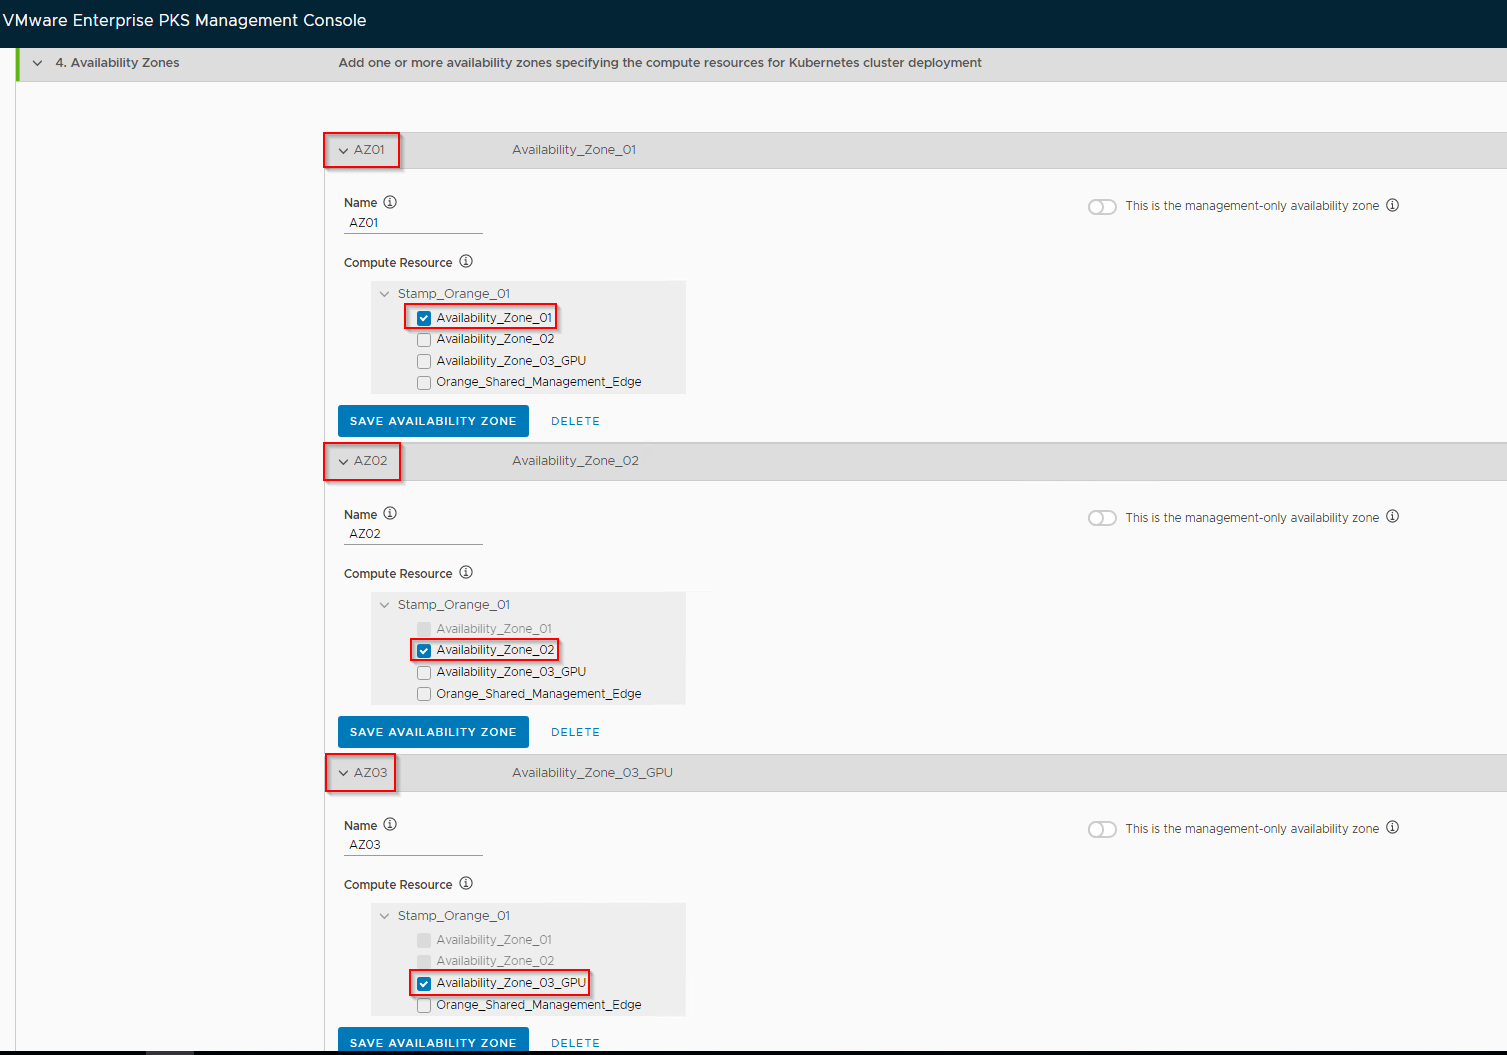
Create Availability Zones. Availability Zones are a BOSH Construct which maps to vSphere Clusters, Host Groups or Resource Pools. Whenever a Kubernetes Cluster is deployed, the Master and Worker nodes are deployed across the Availability Zones for Load Sharing and Fault Tolerance. In our case, we have three Compute Clusters which maps to three Compute Availability Zones. AZ01 is shared to host the PKS Management components.
Select the Ephemeral Storage to store temporary VMs in case of installation, upgrade and operations. Ephemeral VMs are automatically created and deleted as needed by the BOSH Director. Since we have three Availability Zones (three vSAN clusters), select all the three vSAN datastores. Alternatively, if there is any datastore accessible across all the Availability Zones, that can be used.
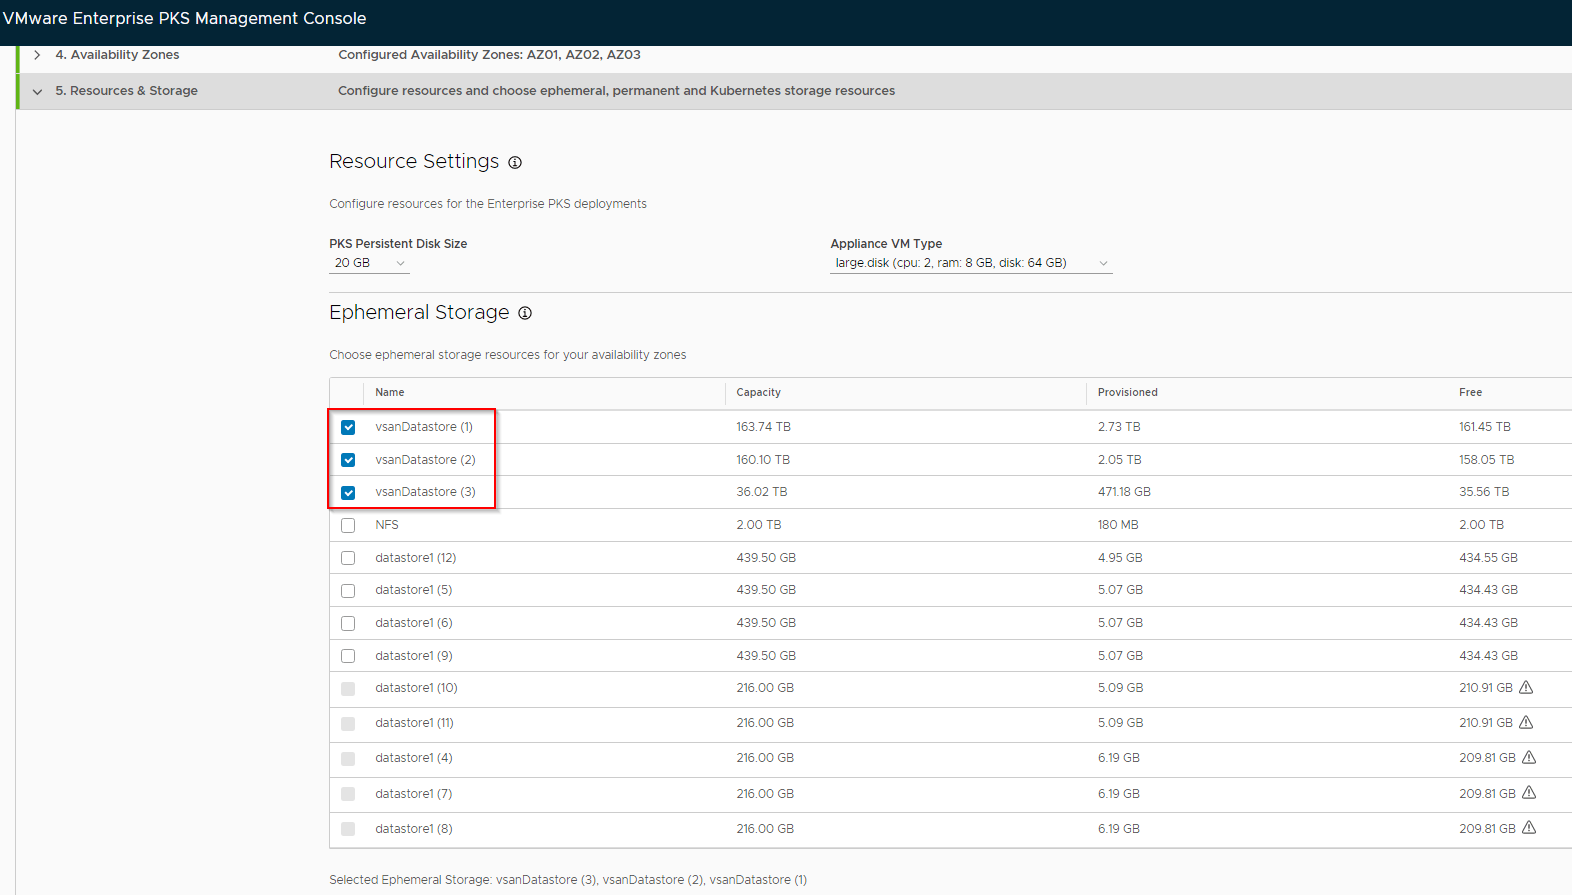
Select the Permanent Storage where the PKS VMs are deployed. Since we have three Availability Zones (three vSAN clusters), select all the three vSAN datastores.

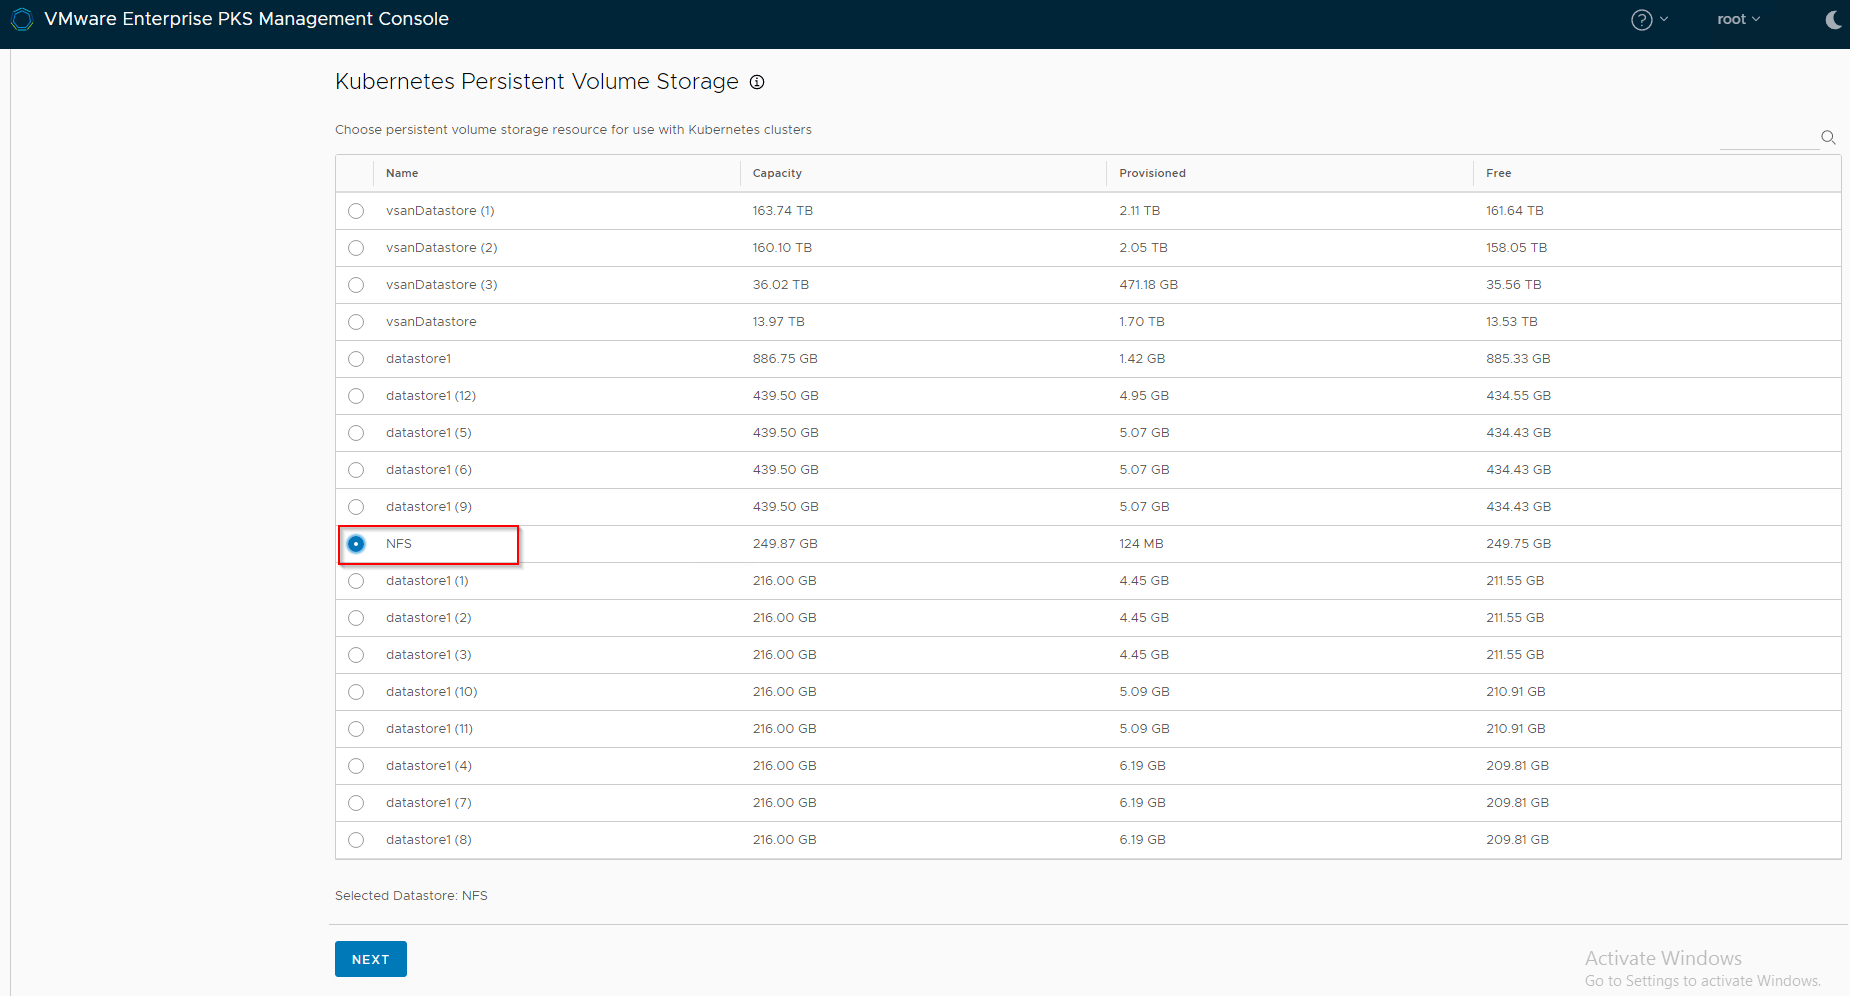
Select the datastore to store persistent volumes for Kubernetes Clusters. We already have a shared NFS datastore accessible across all the Availability Zones and will use that.
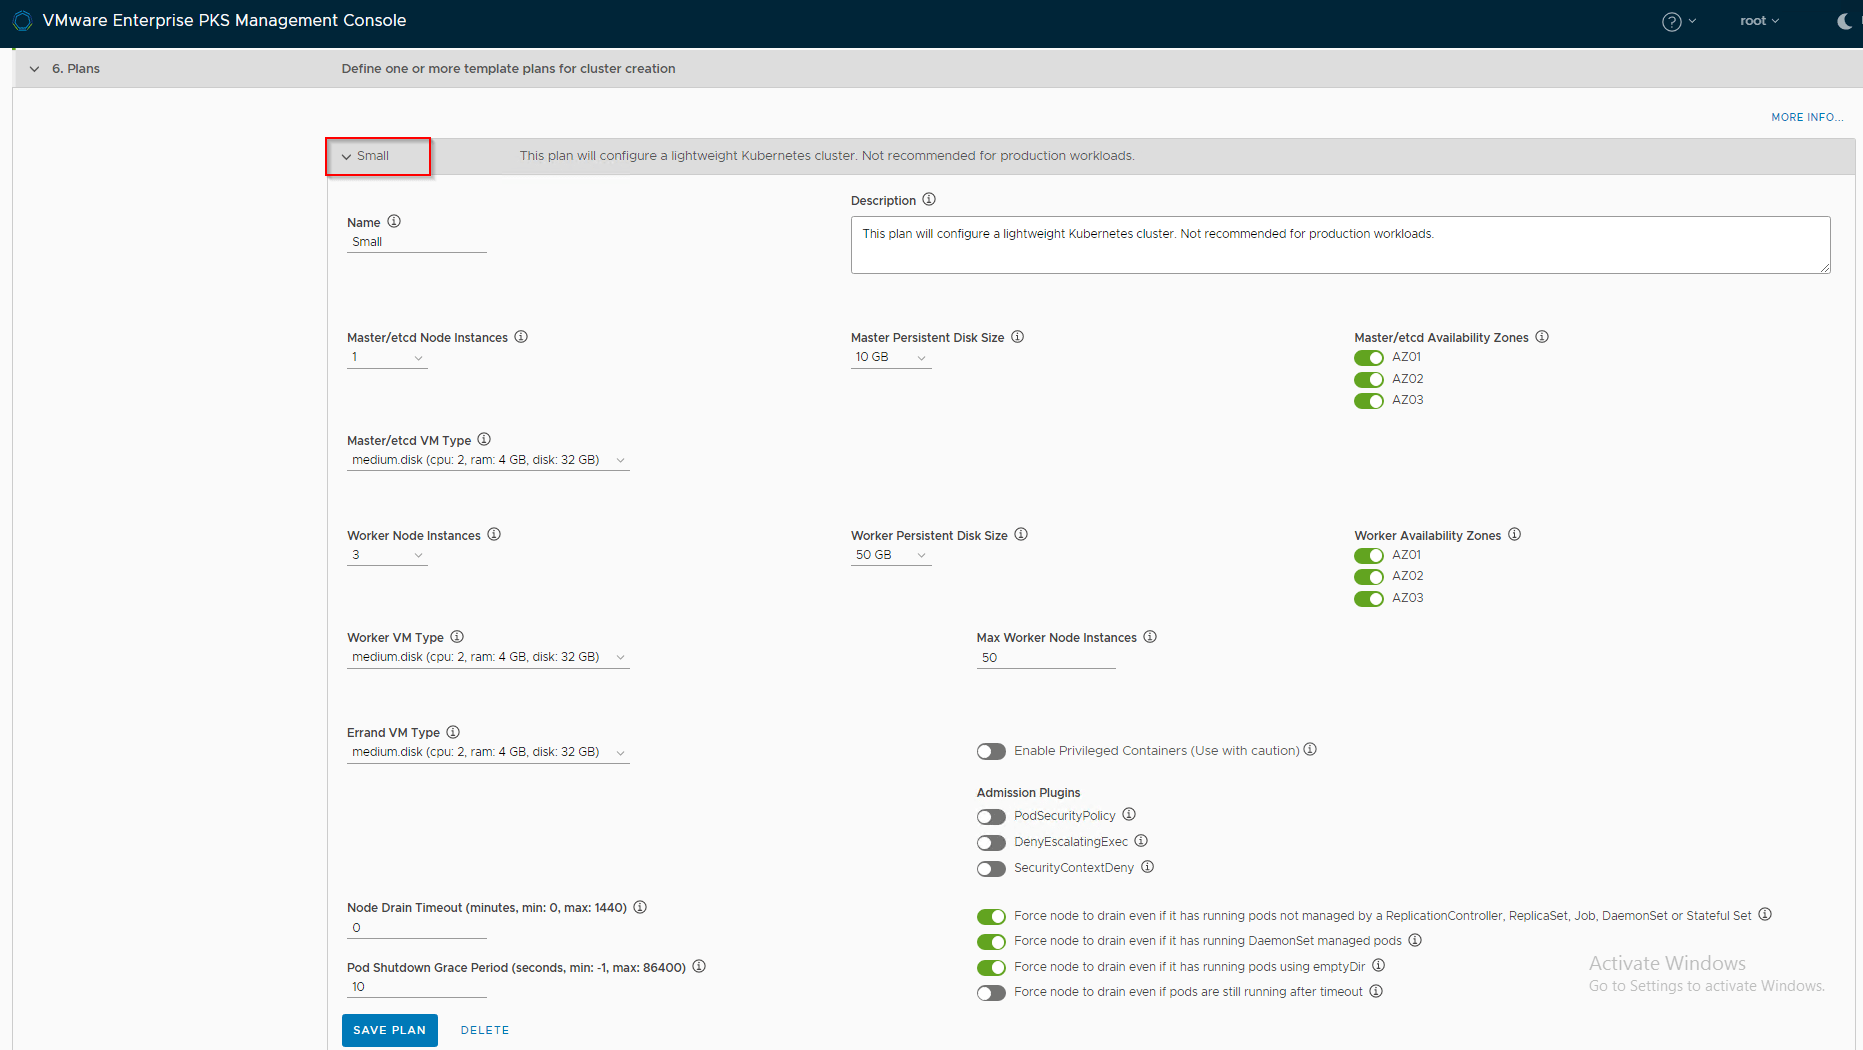
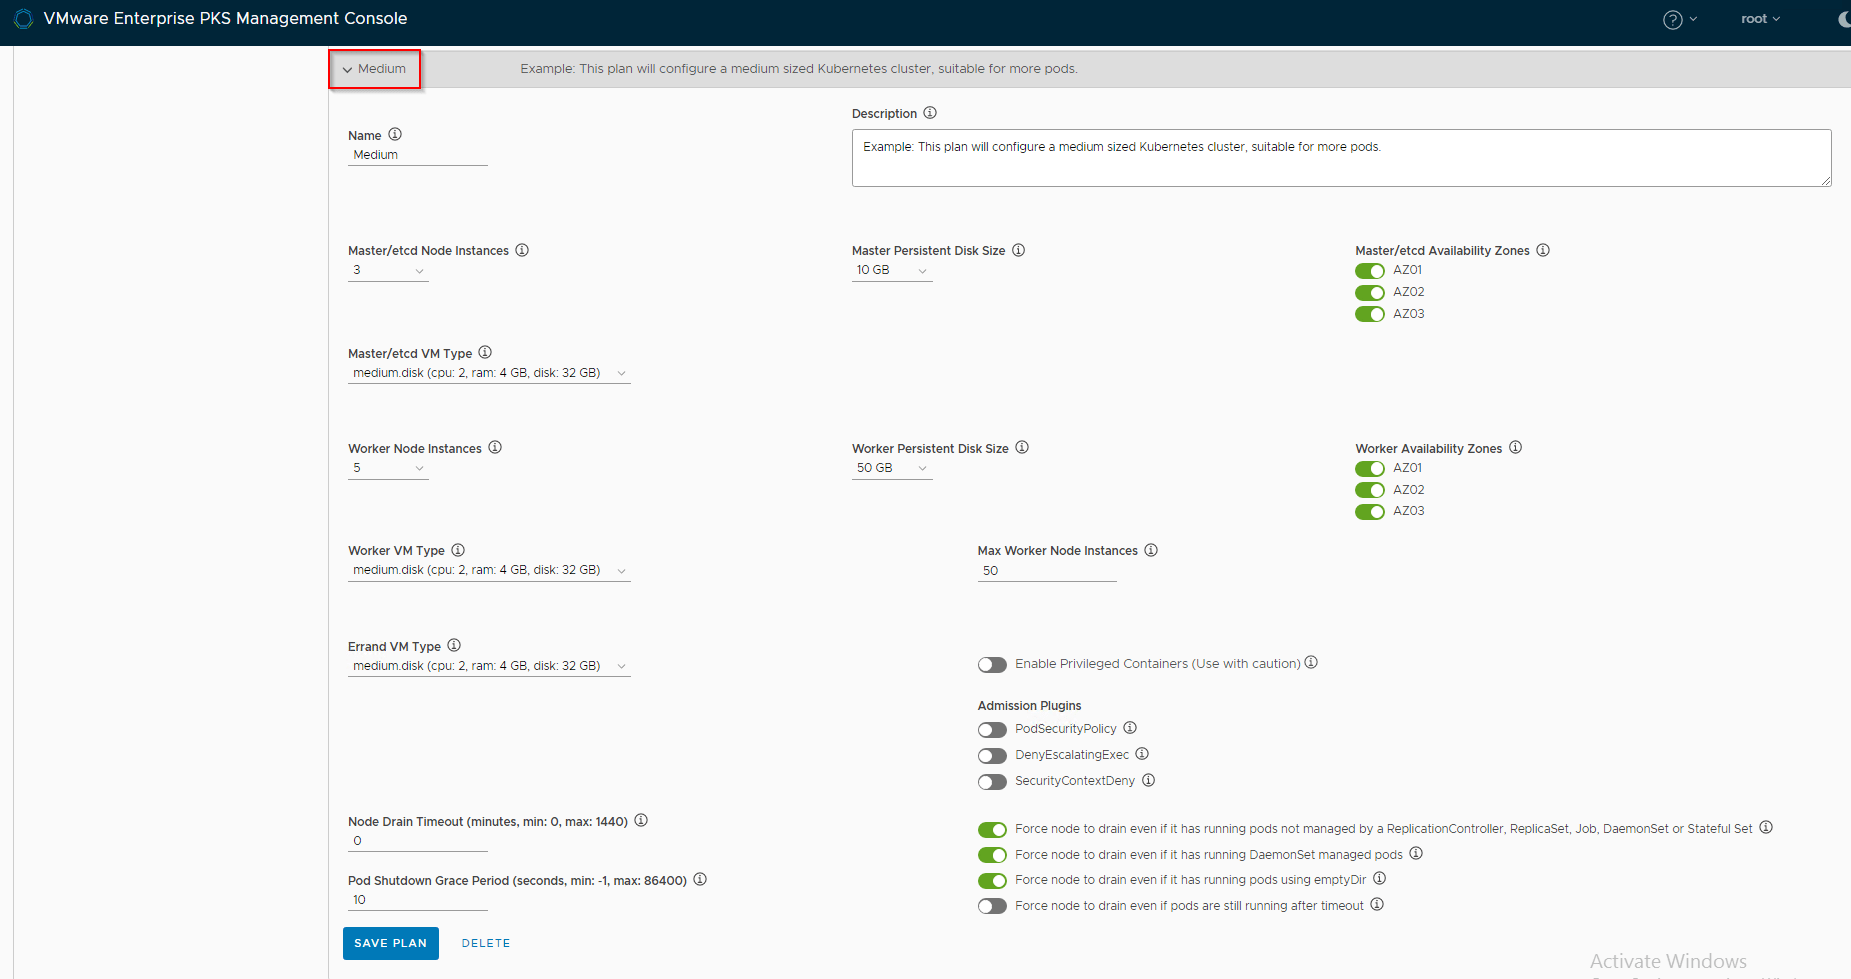
Create the plans for Kubernetes Clusters. Plans are configuration templates that specifies the master/worker counts, resources, VM sizes and other custom properties of the Kubernetes Clusters. Atleast one plan is mandatory. Make sure that all the Availability Zones are enabled for the plans for load sharing and better fault tolerance. We’ve created three plans – Small, Medium and Large.


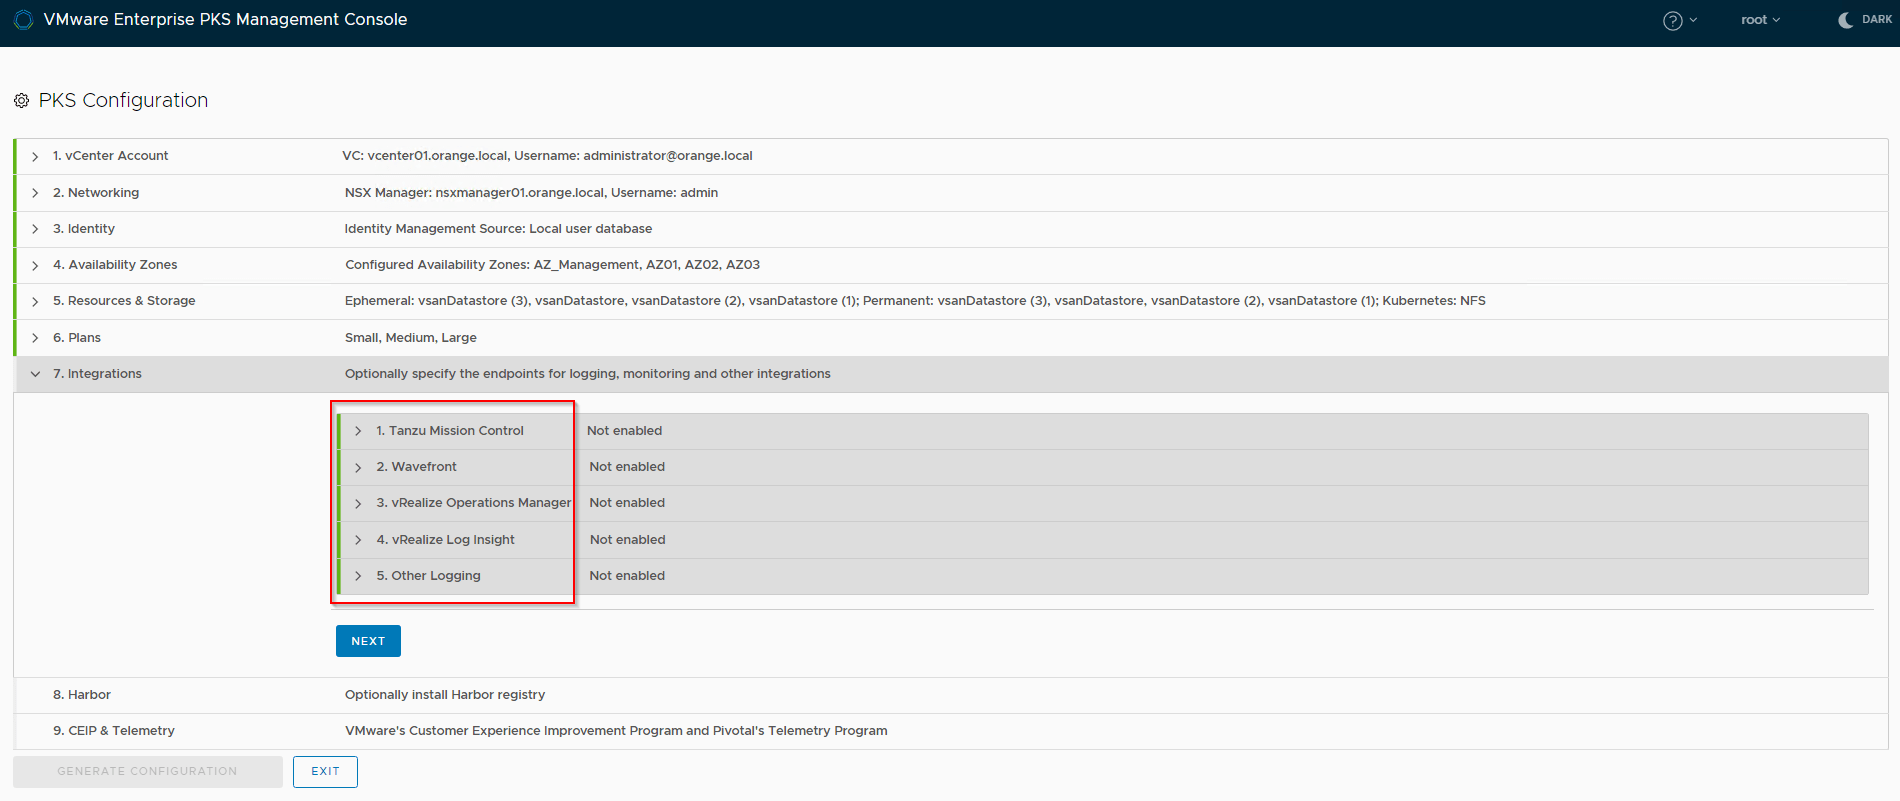
Select Integrations if needed.
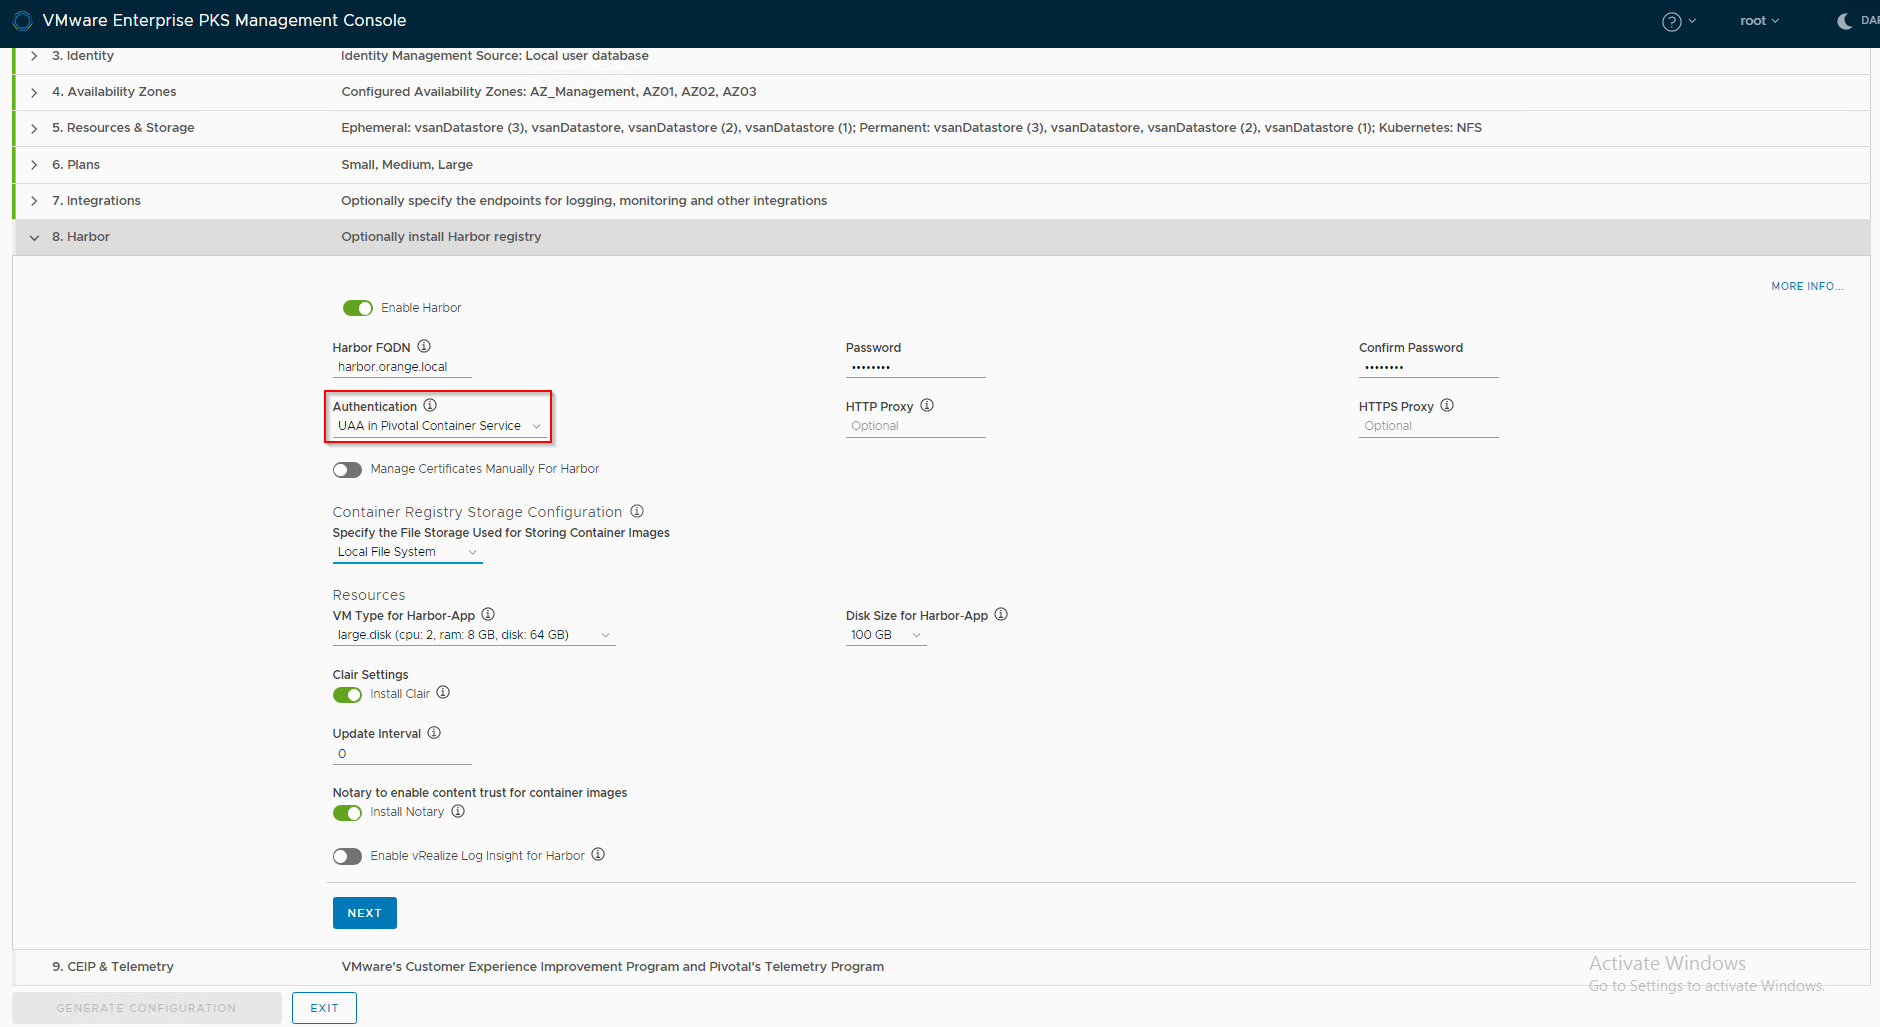
Optionally enable Harbor Registry as a repository to store container images. Install Notary and Clair if needed.
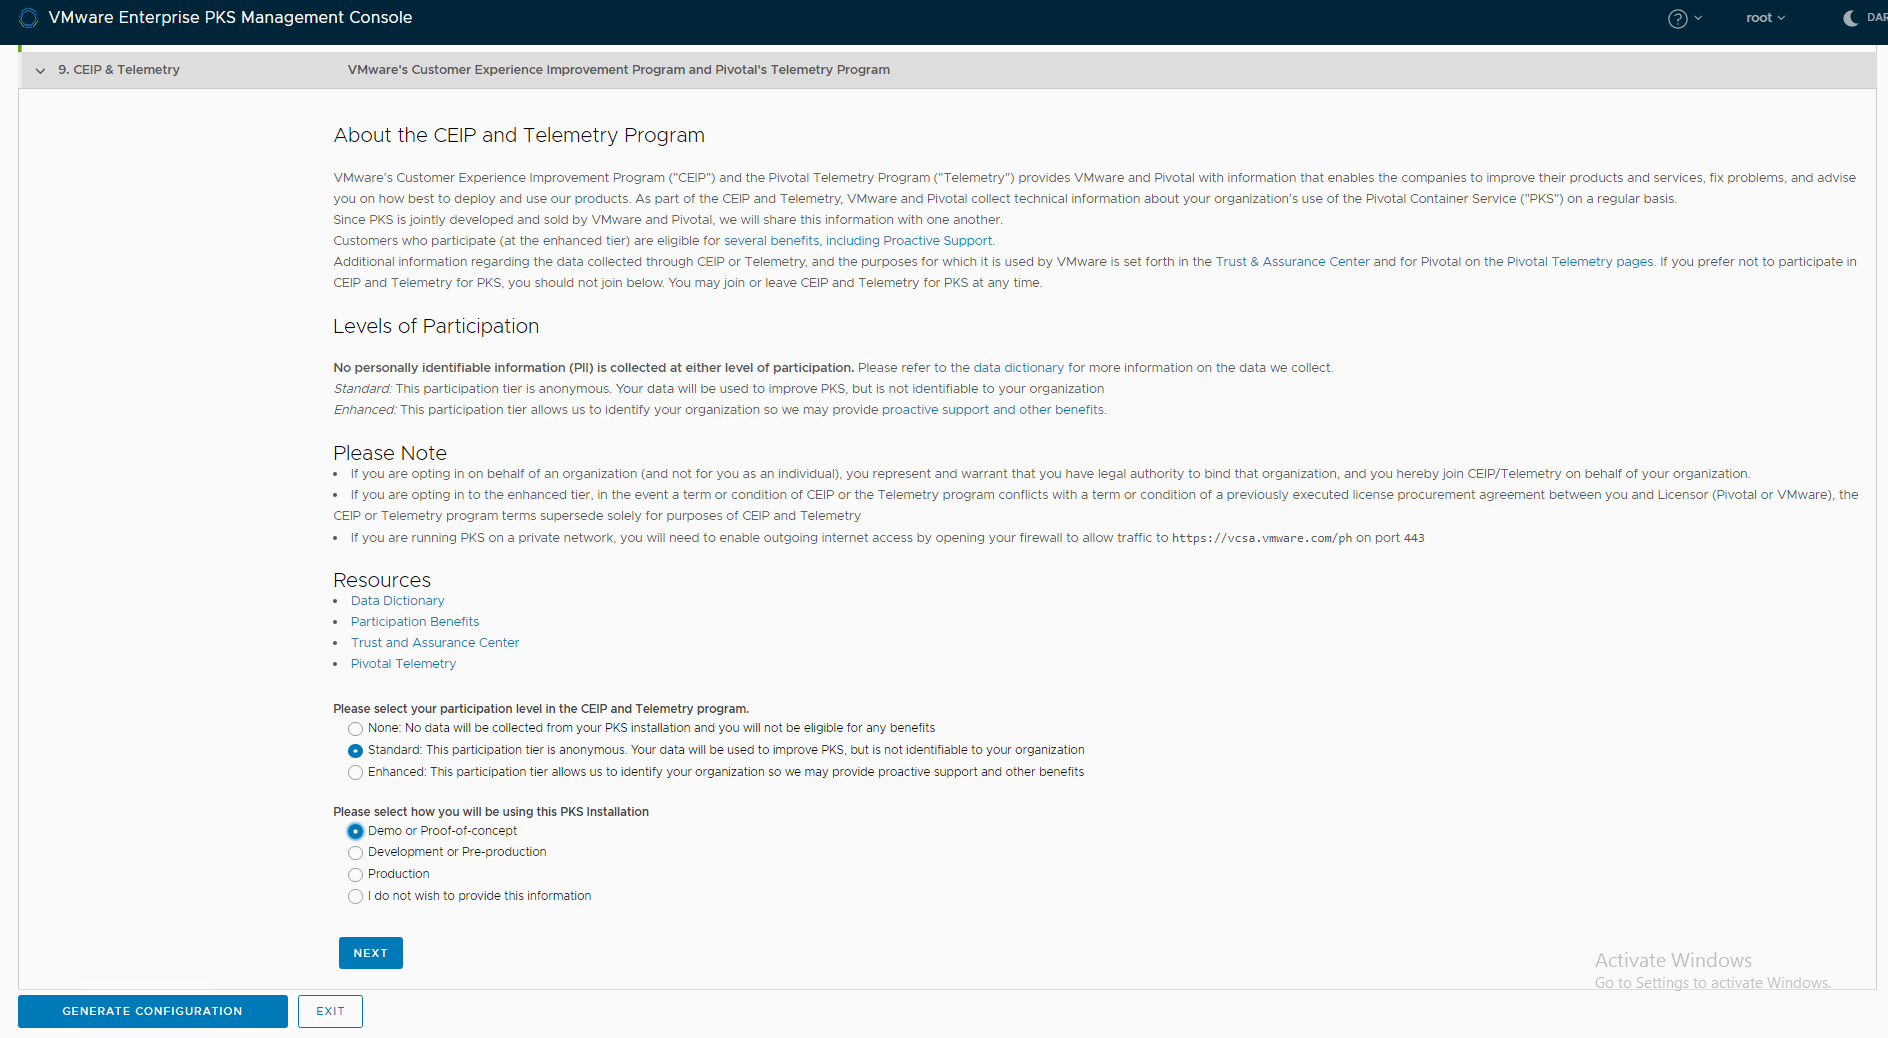
Join CEIP and Telemetry program, if needed.
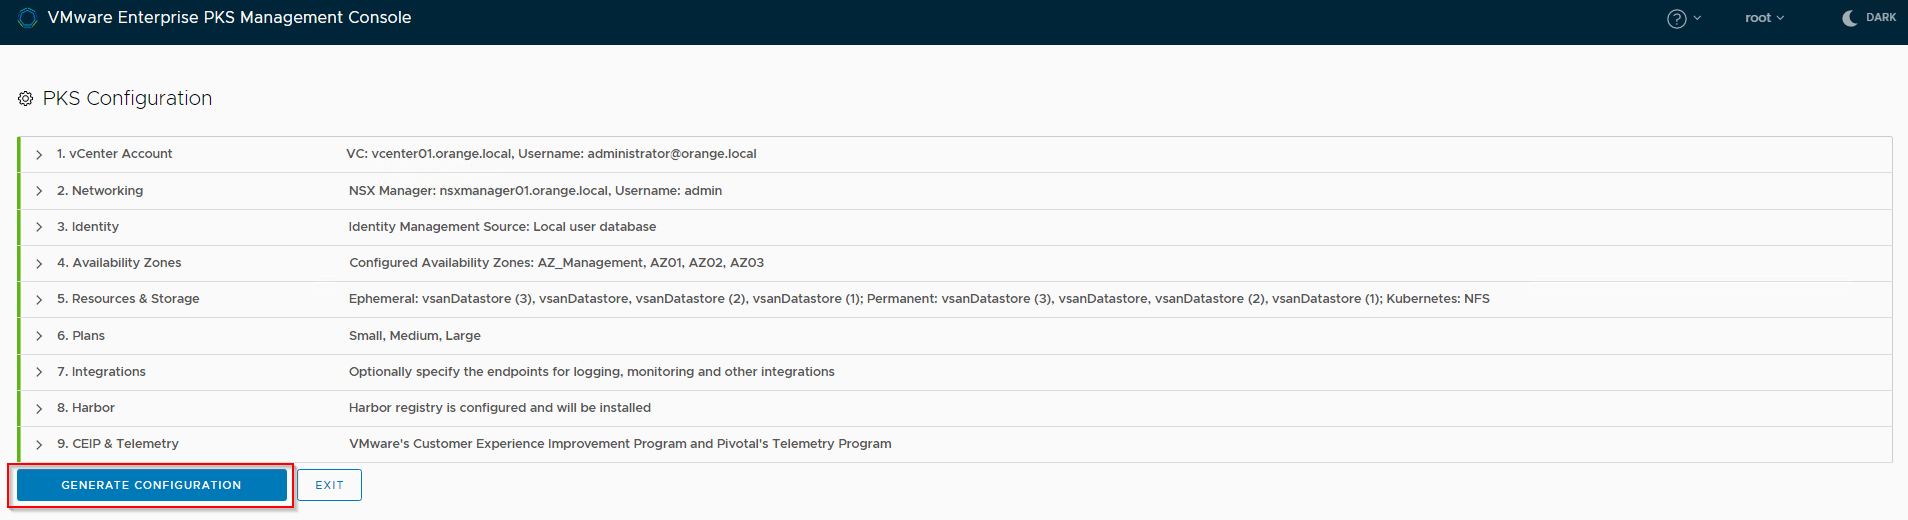
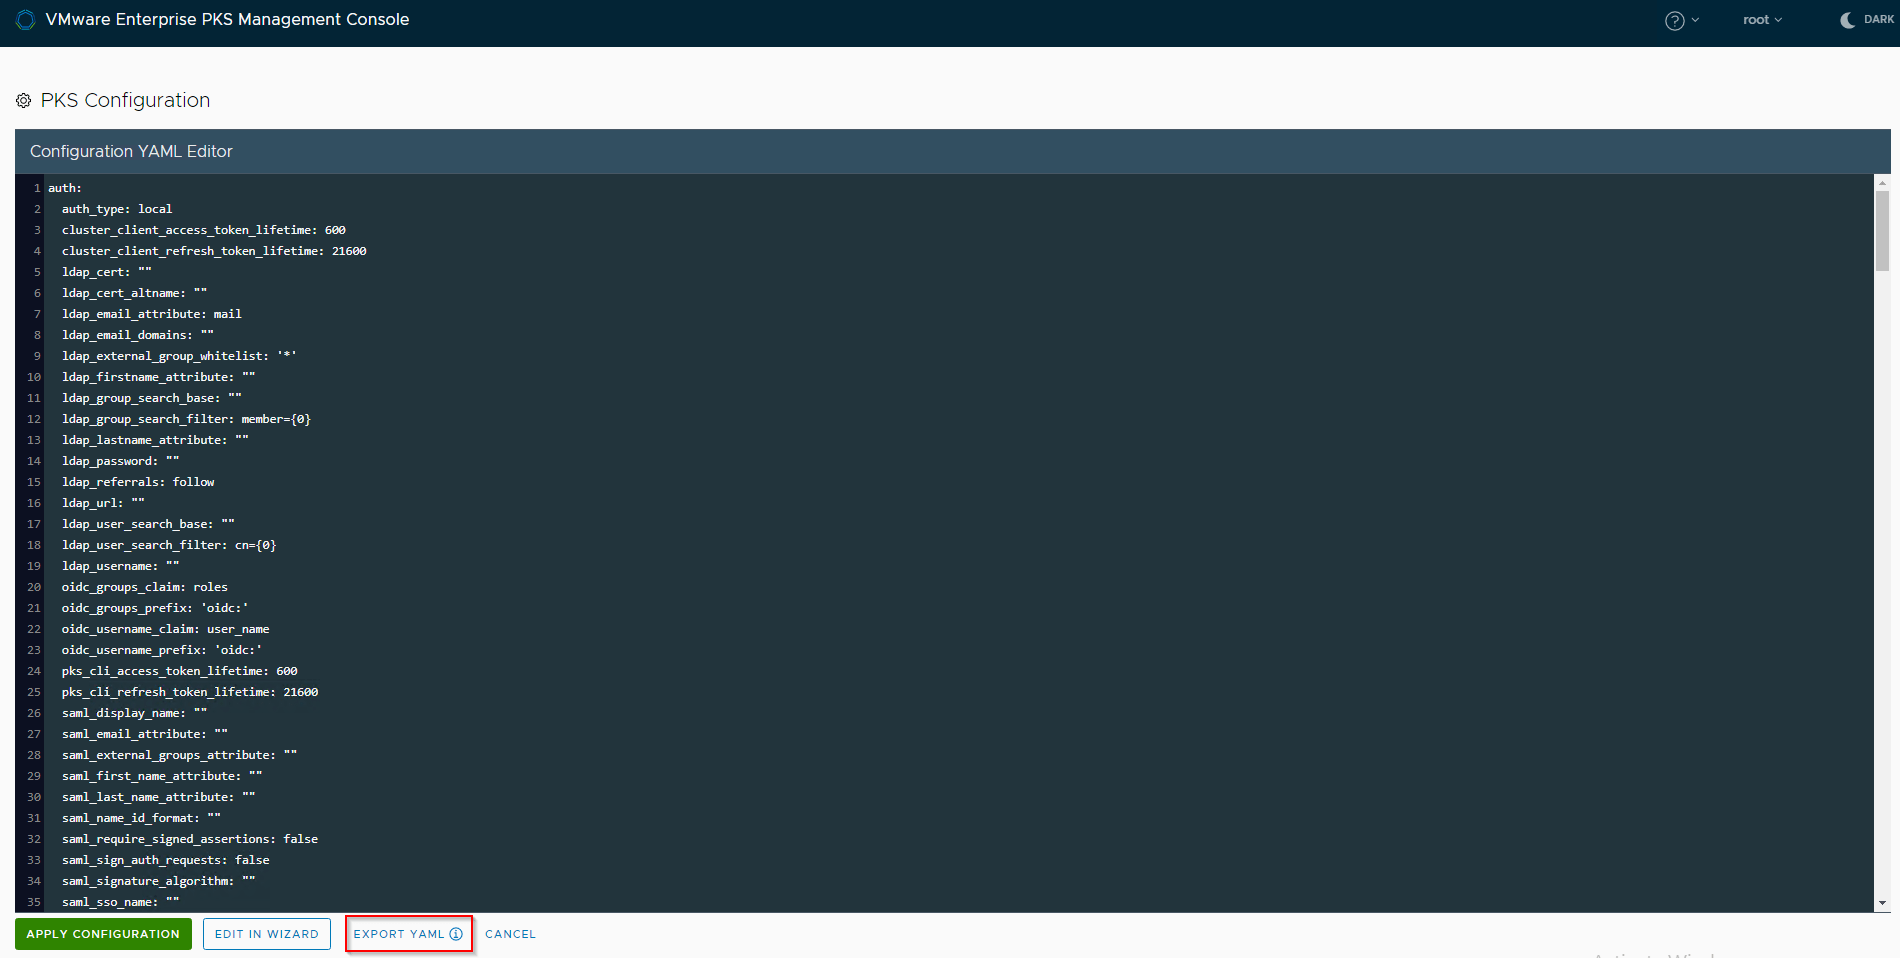
Generate the configuration and if needed, export and save the yaml file.
Deploying Enterprise PKS
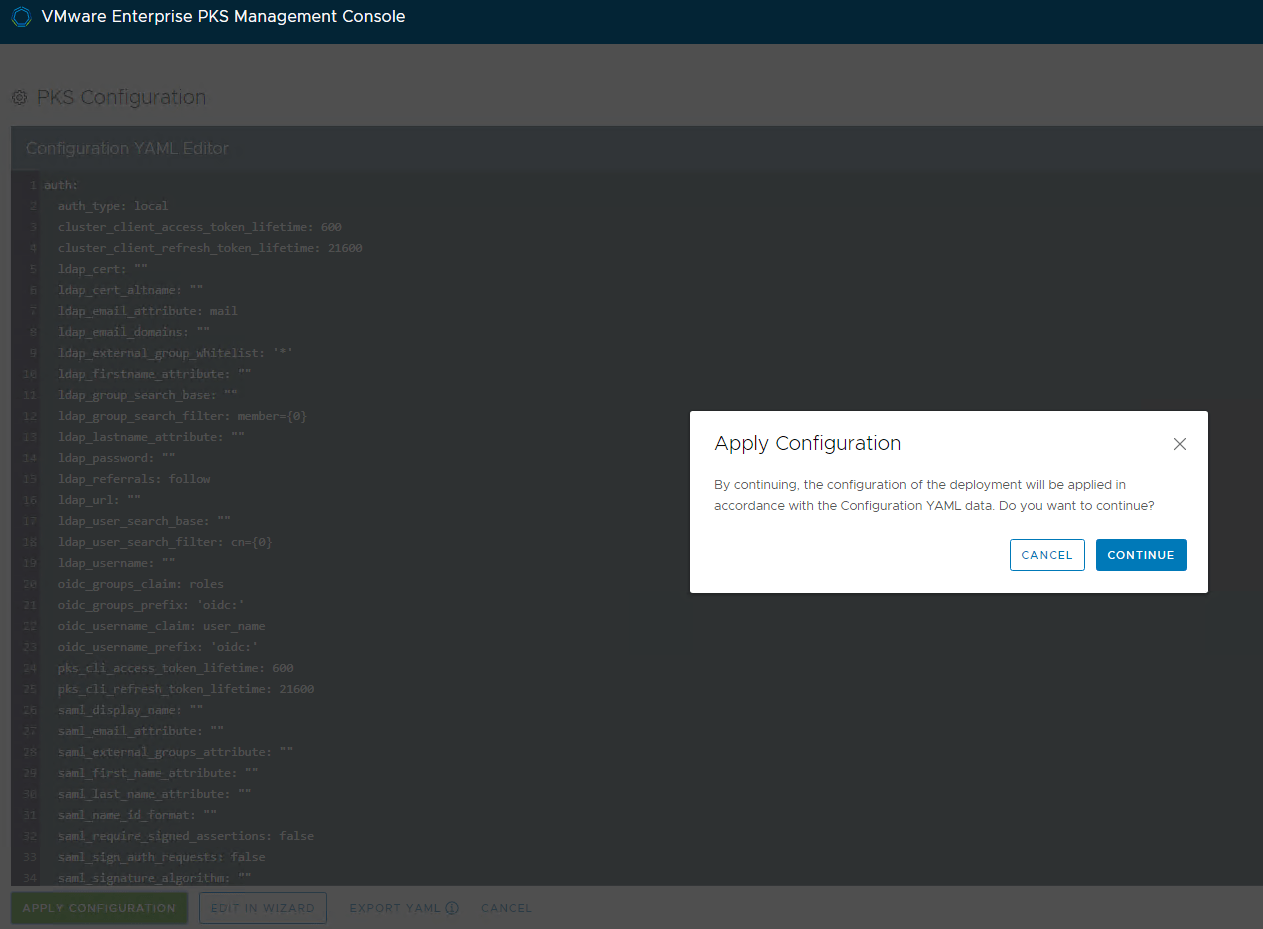
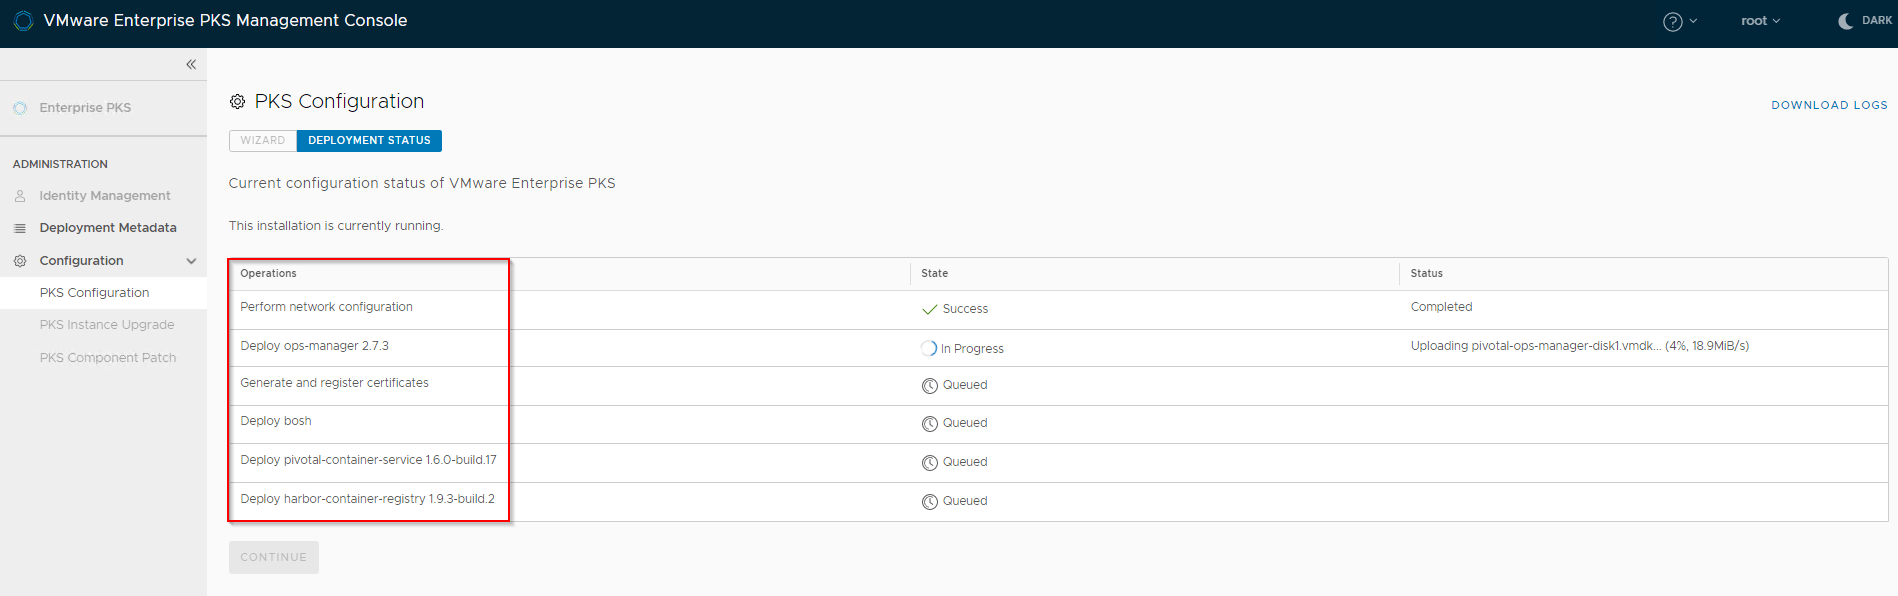
Click on Apply Configuration, the deployment starts and wait for it to finish. It takes nearly an hour to complete.
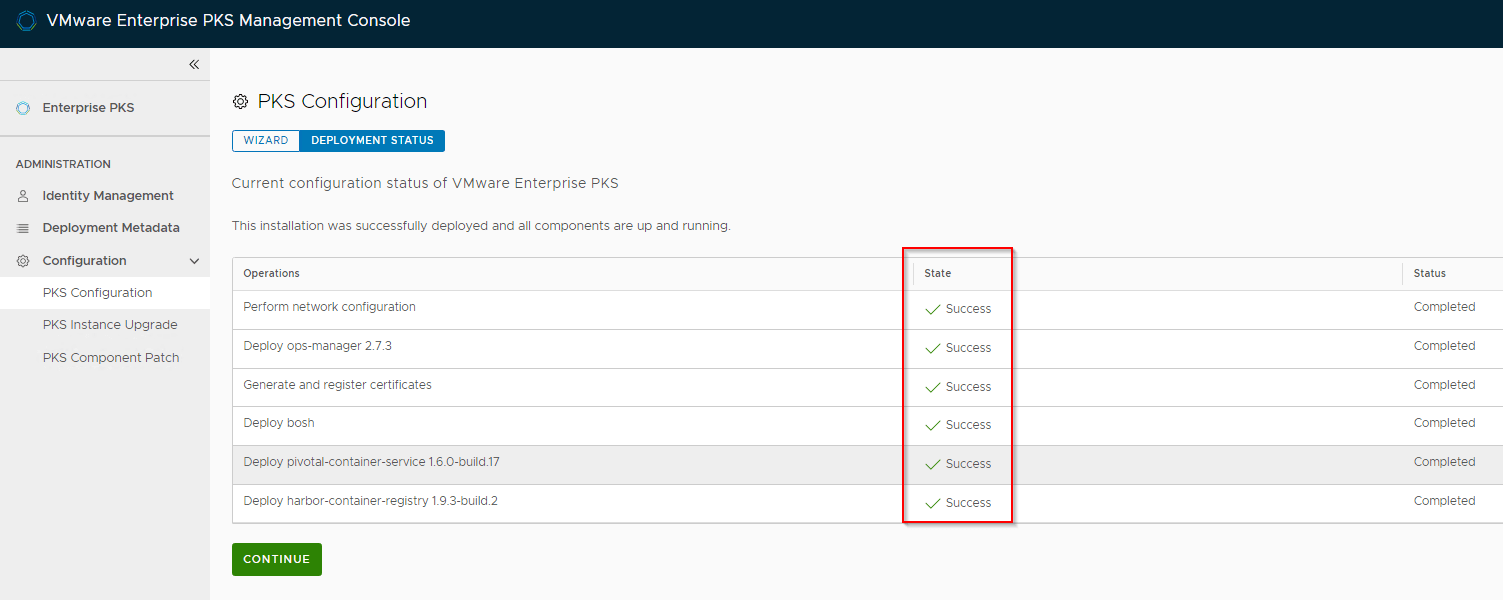
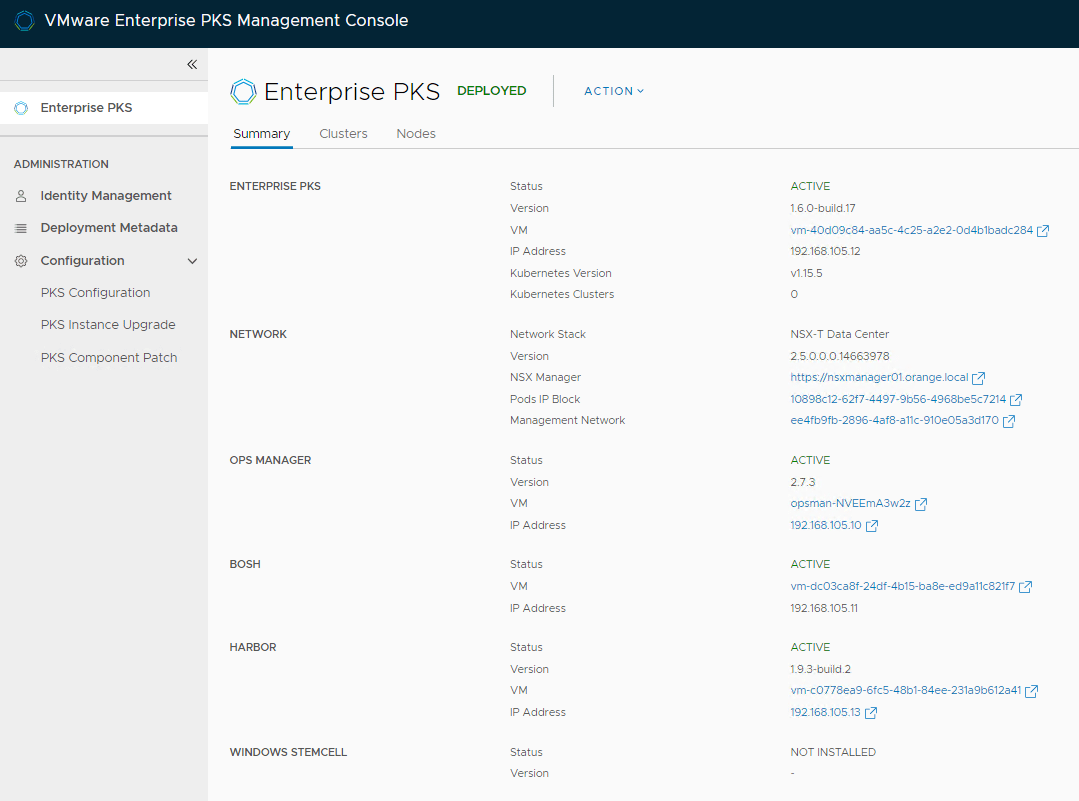
Once the deployment has succeeded, we are presented with a nice dashboard with links to access the deployed PKS services.
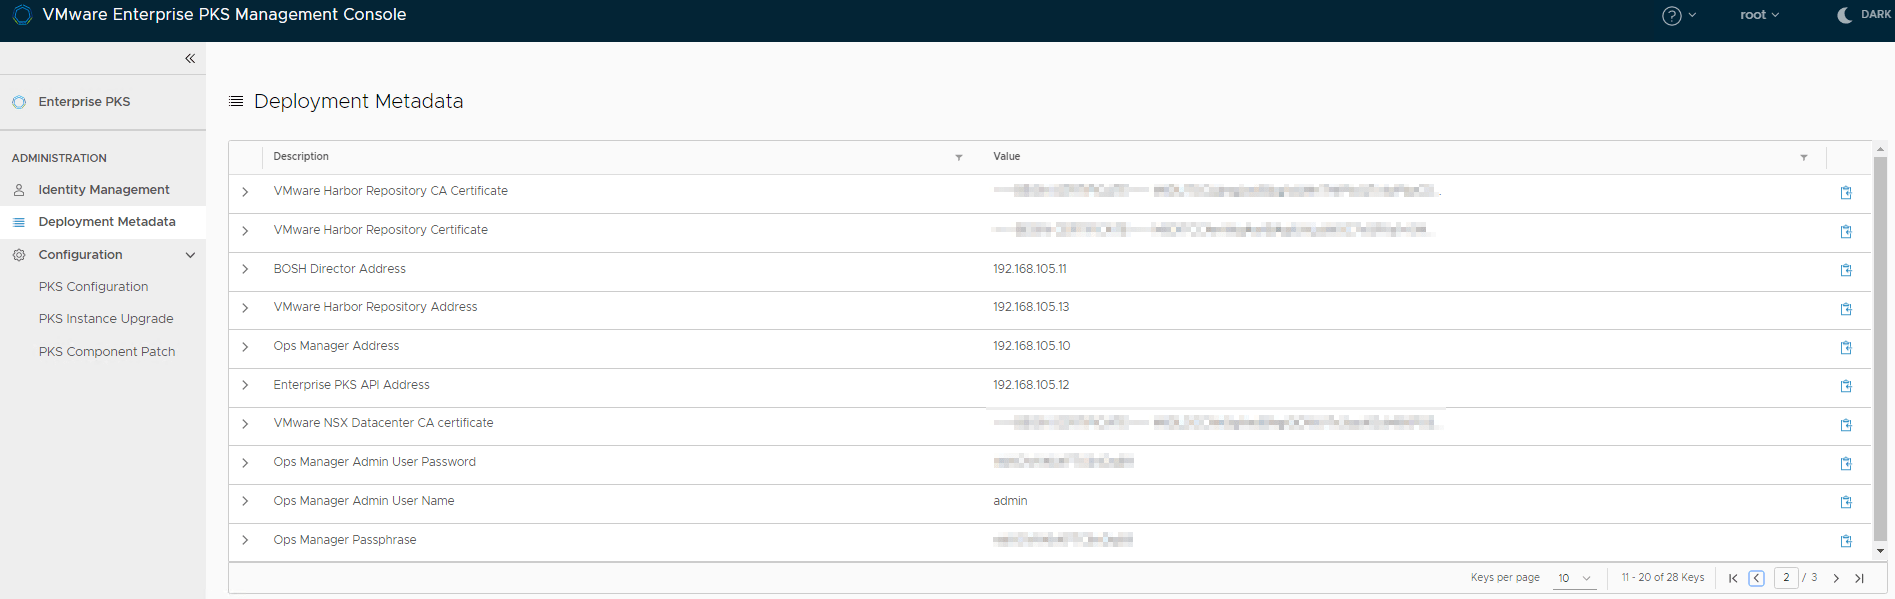
Deployment metadata tab shows the IPs, username and credentials to access the PKS services. Since we used NAT mode for the PKS Management network, the IPs shown here corresponds to the NAT IPs (taken from the floating pool)
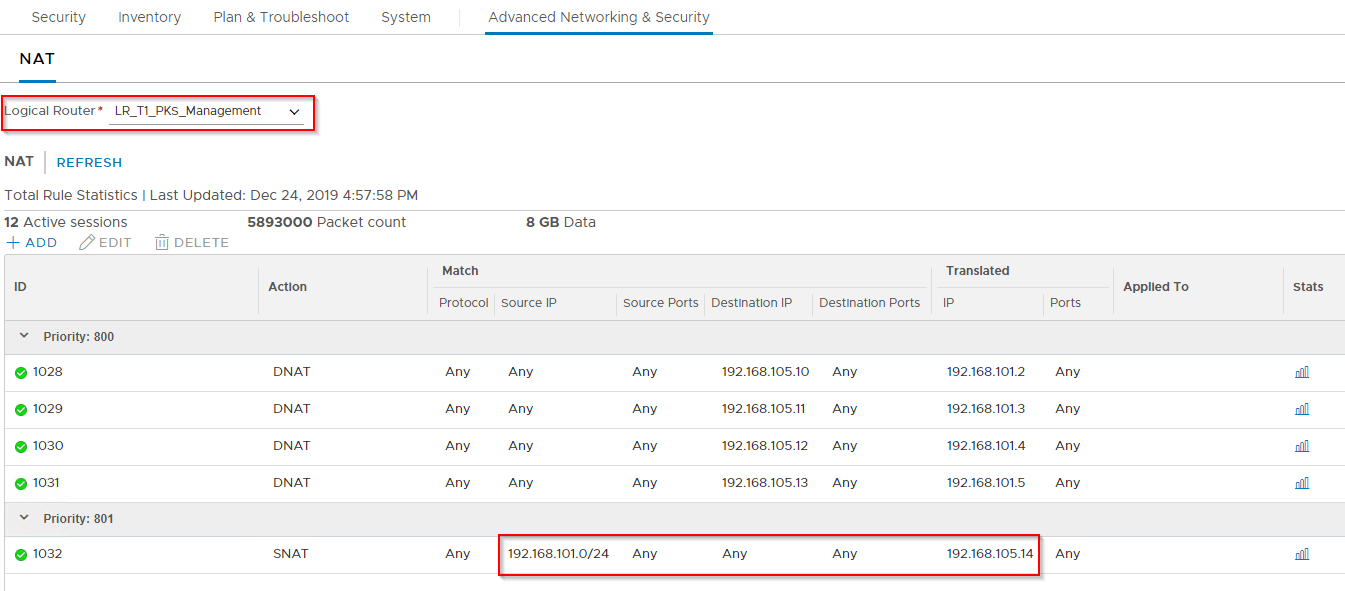
We can see the relevant SNAT/DNAT rules created for the PKS Management Network under the NSX-T Tier 1 Gateway instance.
Navigate to the Pivotal Ops Manager WebUI and explore the tiles to confirm that the settings are mapped correctly.
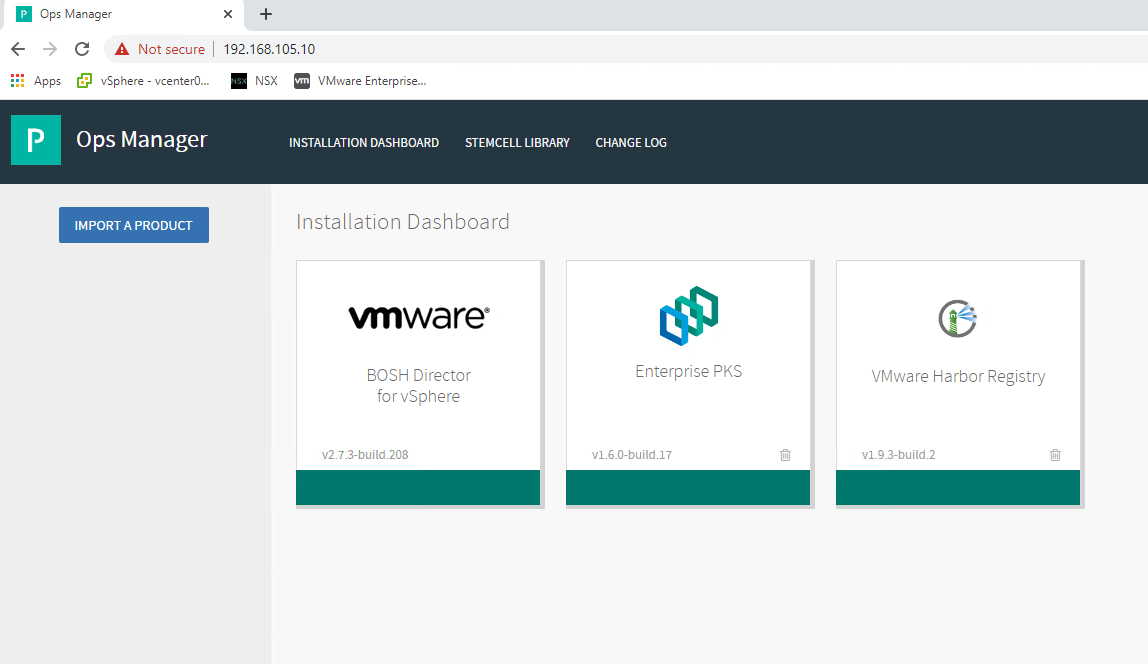
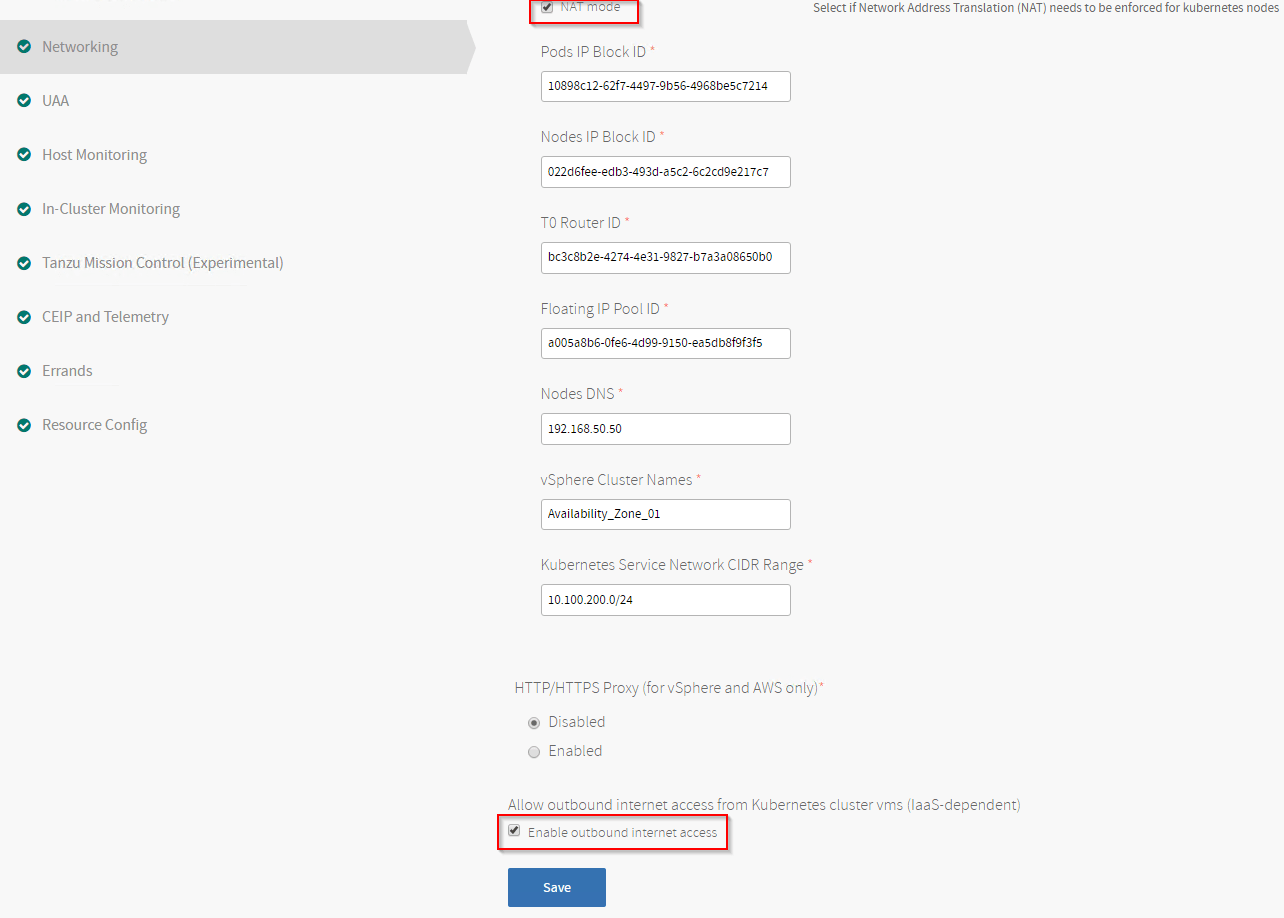
Optionally set the default NAT mode for Kubernetes nodes. This setting can be overridden using PKS network profiles during cluster creation.
Also, confirm that the PKS Management VMs are deployed on the shared AZ01.
Finally as part of post-deployment validation, verify the Enterprise PKS Deployment on vSphere with NSX-T using the steps outlined in the Pivotal documentation.
https://docs.pivotal.io/pks/1-6/nsxt-install-verify-pks.html
This concludes the 4-part blog series.
I hope this was informative. Thanks for reading
Continue reading? Here are the other parts of this series:
