

This is Part 2 of the blog series on Deploying Confluent Kafka Platform on VMware Enterprise PKS with NSX-T Networking. In Part 1, we have deployed the Confluent Operator, Zookeeper Ensemble and Kafka Broker Cluster. If you have missed it, you can read it here:
In this article, we will deploy rest of the Confluent Platform Components followed by a quick publish-subscribe validation.
Let’s get started.
Deploying the Schema Registry Cluster
Similar to how we deployed the other components using helm charts, execute
helm install schemaregistry ./confluent-operator -f ./providers/private.yaml –namespace confluentplatform –set schemaregistry.enabled=true
This will deploy 2 X Schema Registry nodes over two availability zones.

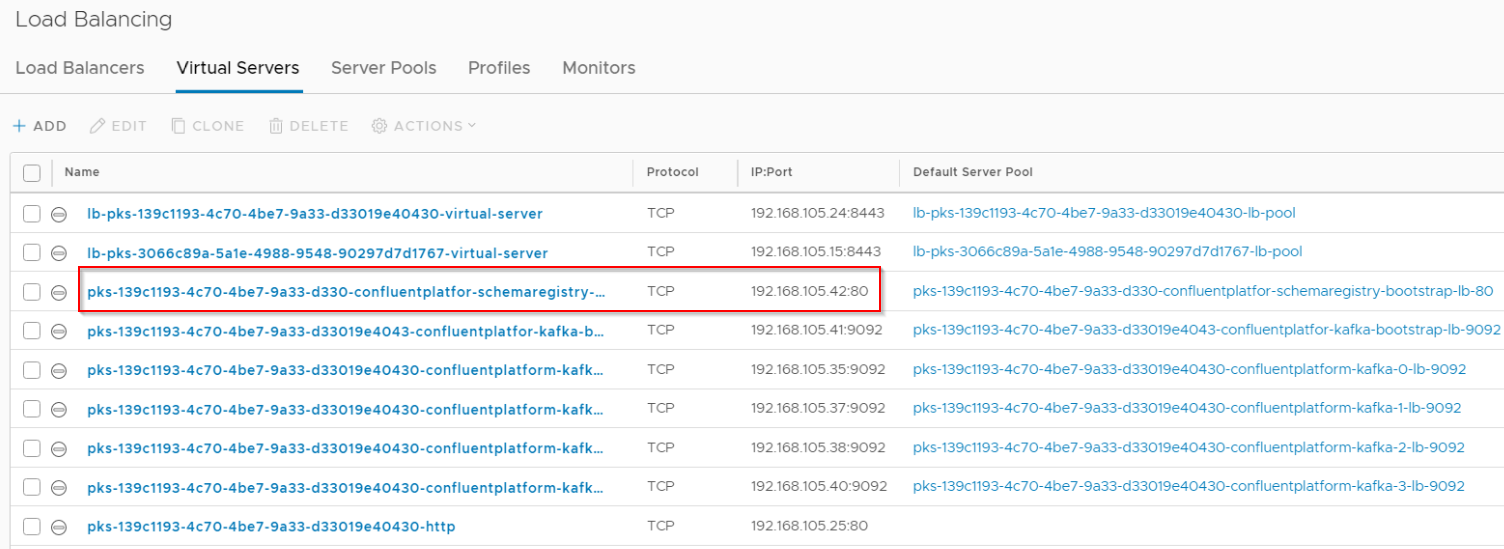
A Loadbalancer Service is instantiated as front-end for ingress access to the Schema Registry cluster.

We should see this as a new Virtual Server (VIP) on the Tier 1 Loadbalancer which was already deployed during the Kubernetes cluster creation.
Schema Registry pods are stateless as the schemas are stored as topics in the broker cluster.
Deploying the Confluent Connect Cluster
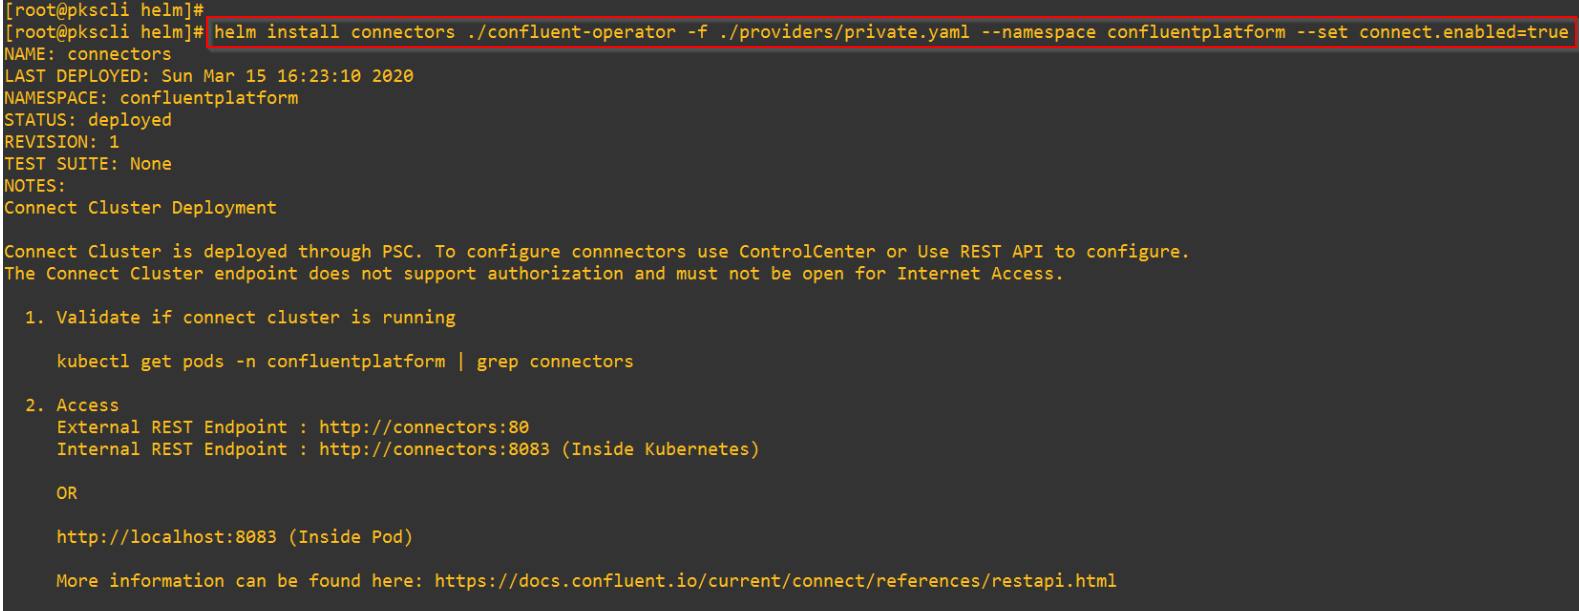
2 X Confluent Connect nodes are deployed over the two availability zones.

A Loadbalancer Service is instantiated as front-end for ingress access to the Confluent Connect cluster.

We should see this as a new Virtual Server (VIP) on the Tier 1 Loadbalancer which was already deployed during the Kubernetes cluster creation.

Confluent Connect pods are stateless as the configurations are stored as topics in the broker cluster.
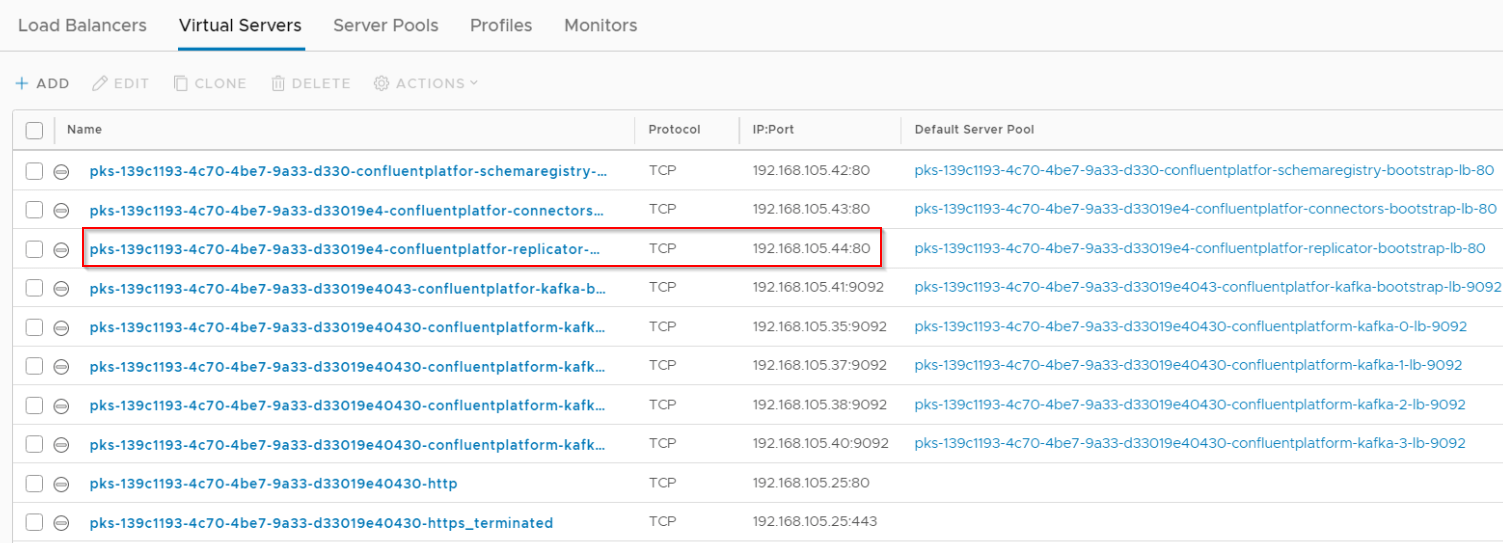
Deploying the Confluent Replicator
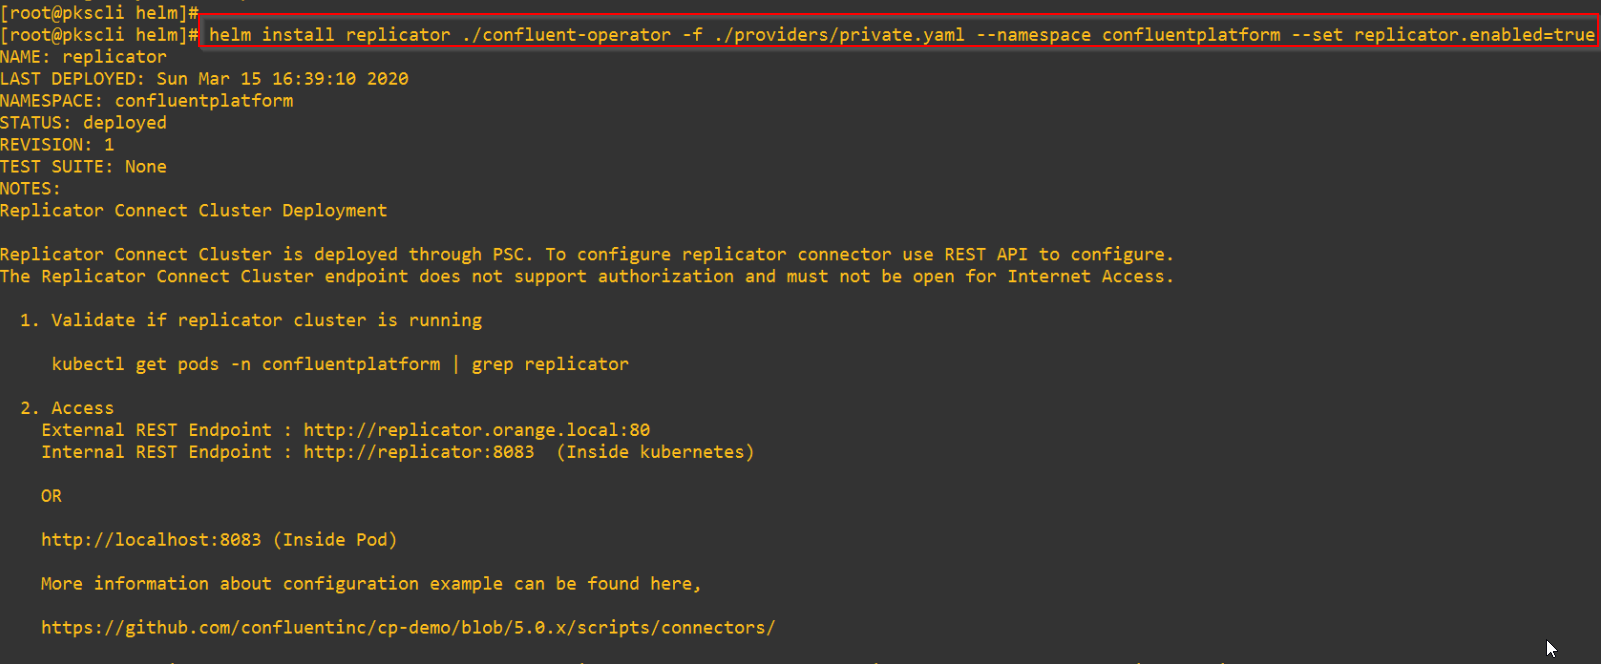
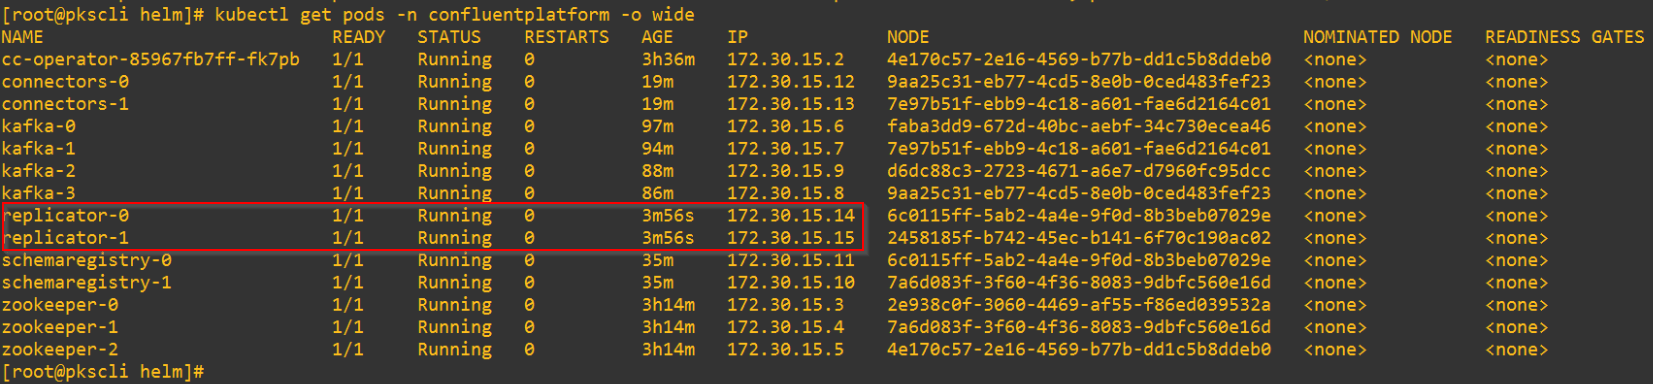
2 X Replicator nodes are deployed over the two availability zones
A Loadbalancer Service is instantiated as front-end for ingress access to the Confluent Replicator cluster.

We should see this as a new Virtual Server (VIP) on the Tier 1 Loadbalancer which was already deployed during the Kubernetes cluster creation.
Confluent Replicator pods are also stateless as the configurations are stored as topics in the broker cluster.
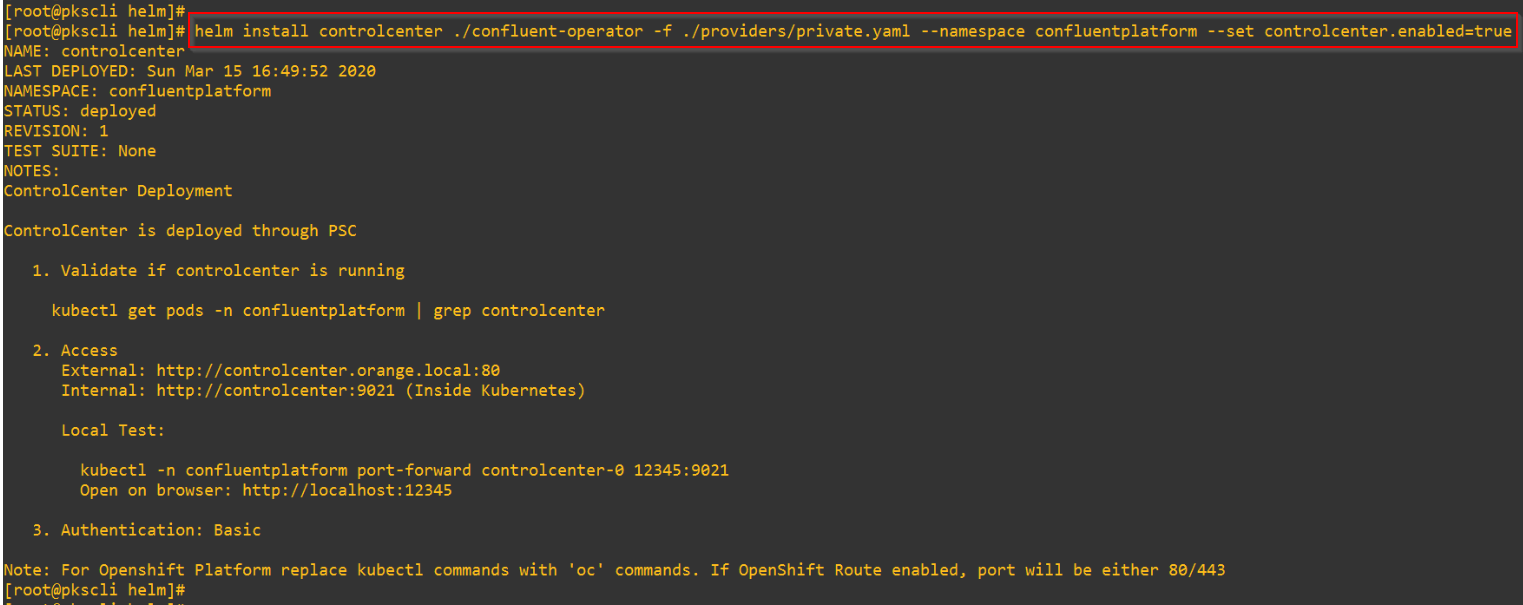
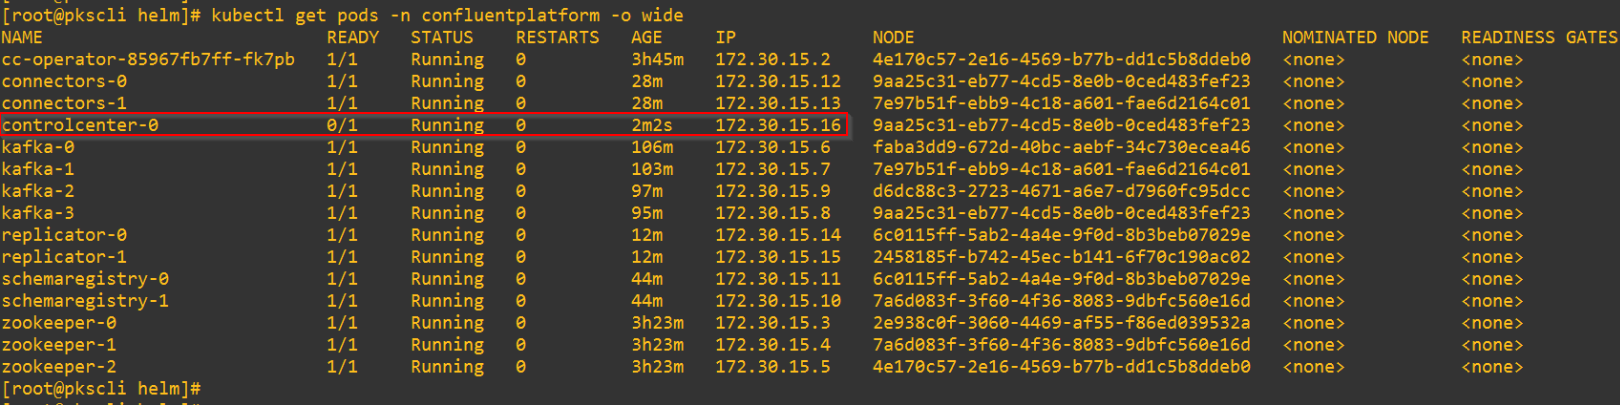
Deploying the Confluent Control Center (C3)
We will deploy one instance of Confluent Control Center.
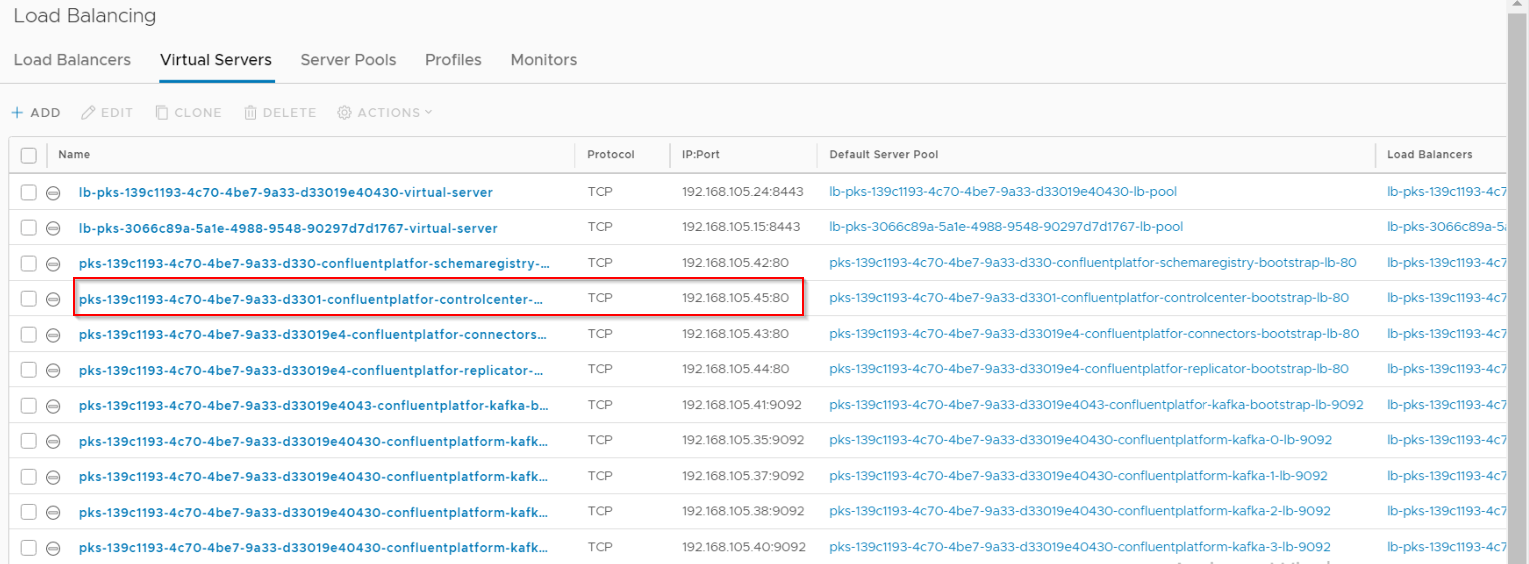
A Loadbalancer Service is instantiated as front-end for WebUI access to the Confluent Control Center.

We should see this as a new Virtual Server (VIP) on the Tier 1 Loadbalancer which was already deployed during the Kubernetes cluster creation.
Persistent Volumes are dynamically created on the NFS datastore for the Confluent Control Center Database. The collected metrics and data is stored as Topics in the Broker cluster.
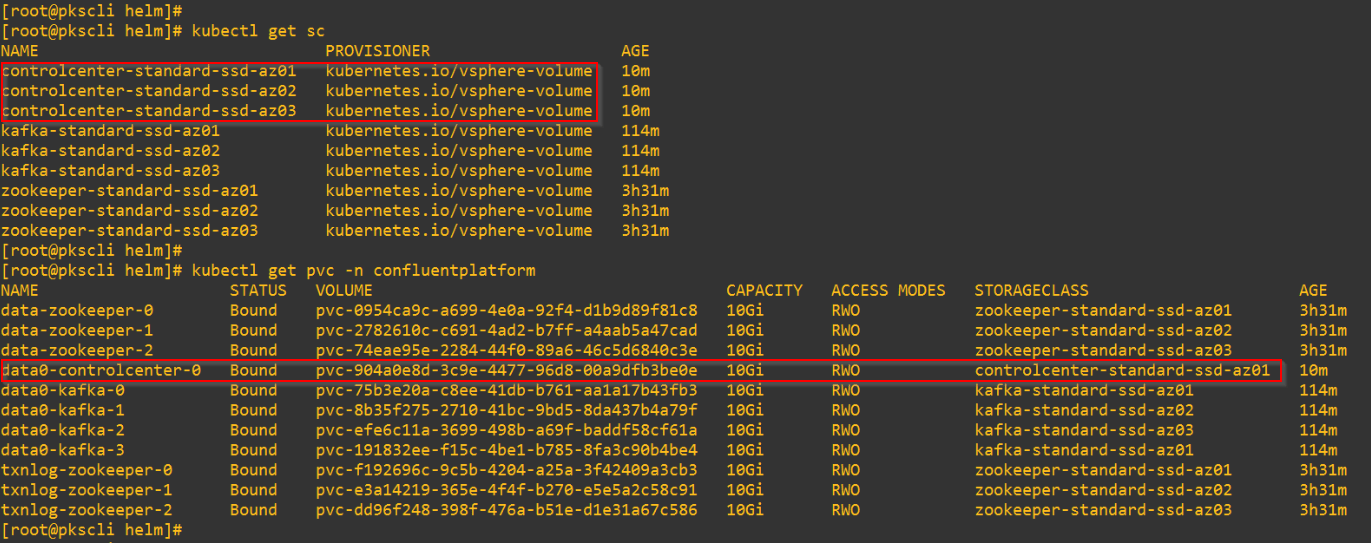
PVs are provisioned as vmdk files on the NFS datastore.

We should be able to access the Confluent Control Center WebUI using the Loabalancer VIP. The credentials to access the WebUI is available in the provider YAML config file.

If Metrics Reporter is enabled (in the Provider YAML file), we should see the Broker metrics and Topic details.

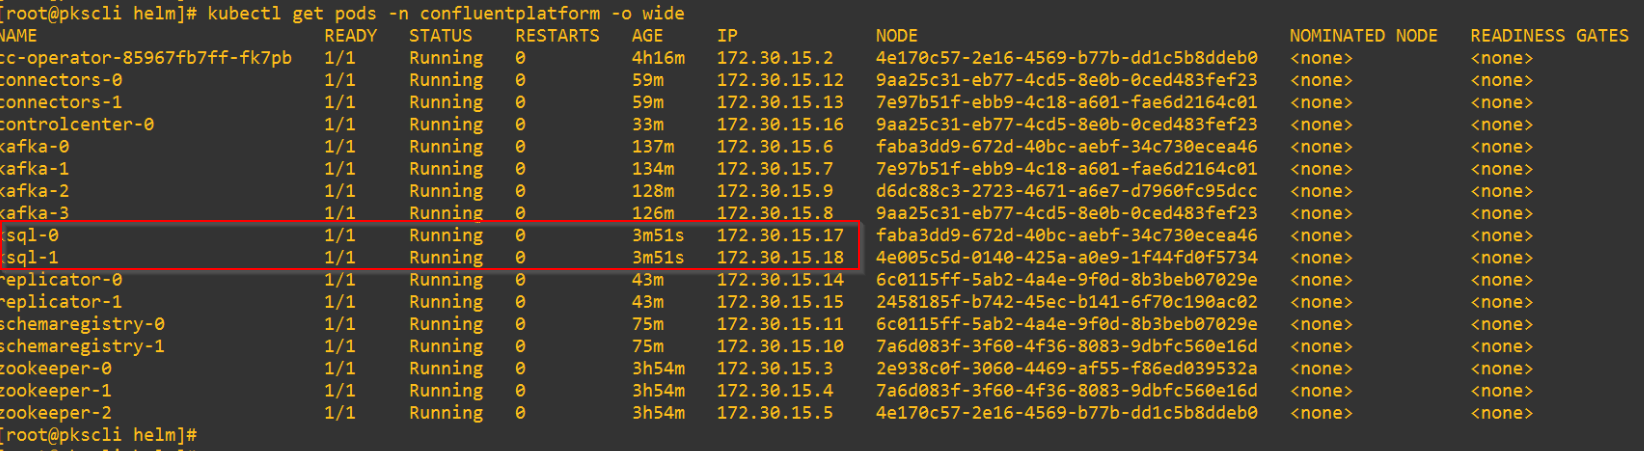
Deploying the KSQL Cluster
2 X KSQL nodes are deployed over the two availability zones.
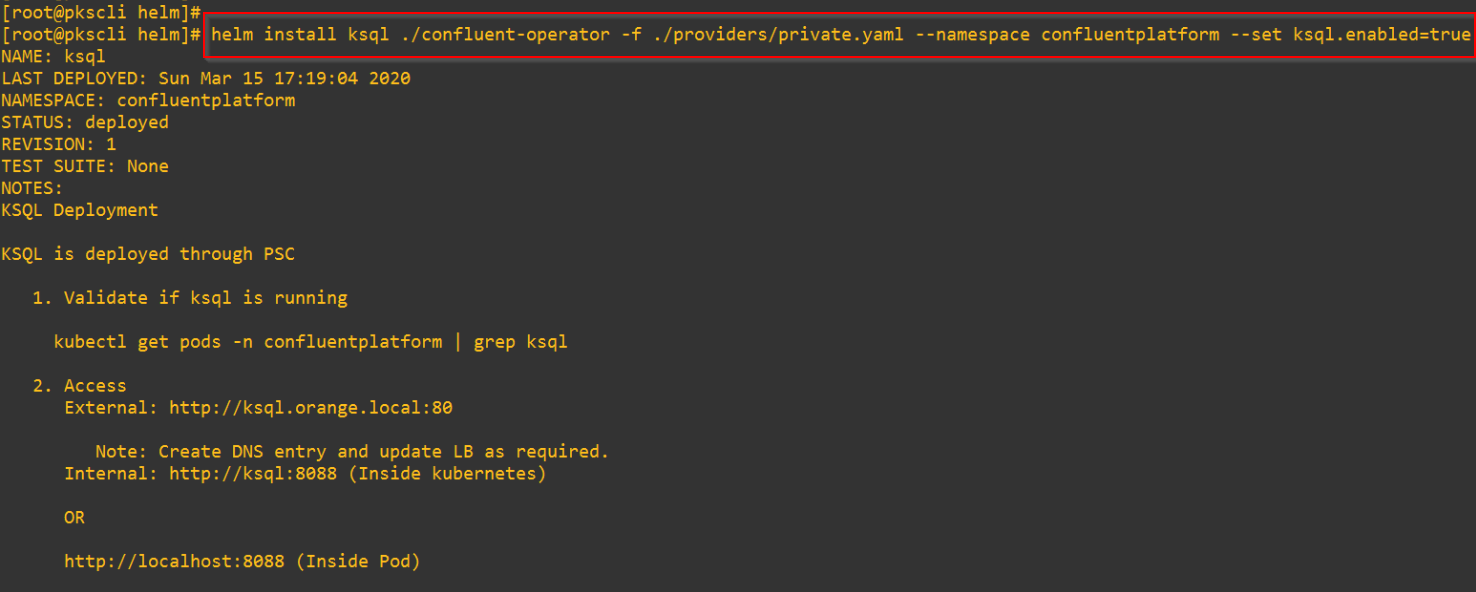
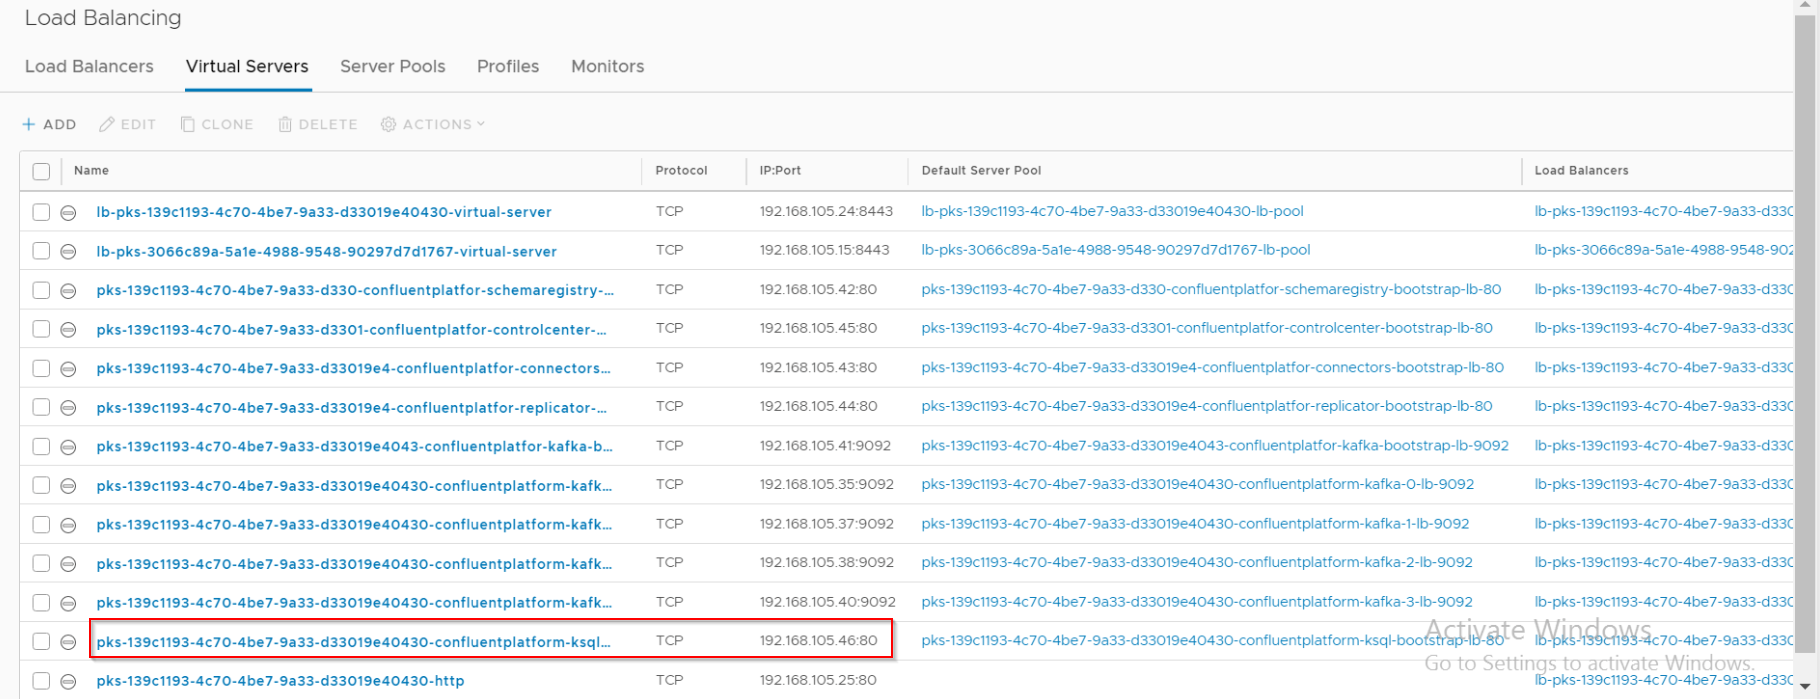
A Loadbalancer Service is instantiated as front-end for ingress access to the KSQL cluster.

We should see this as a new Virtual Server (VIP) on the Tier 1 Loadbalancer which was already deployed during the Kubernetes cluster creation.
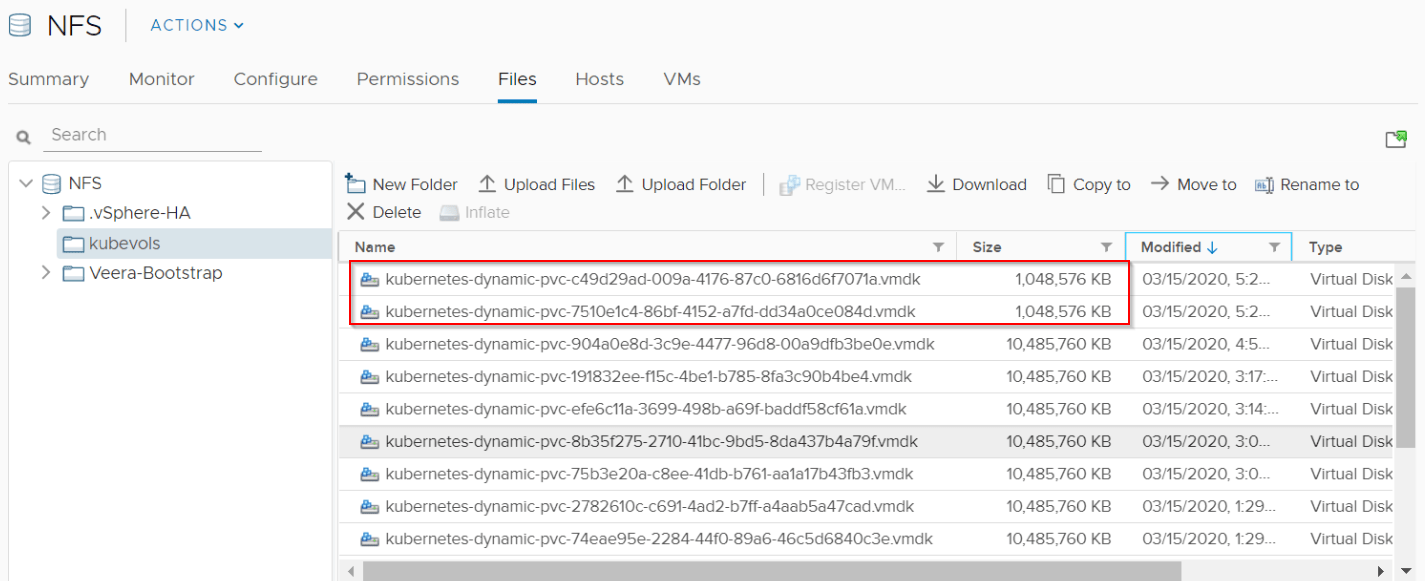
Persistent Volumes are dynamically created on the NFS datastore for the KSQL Database.
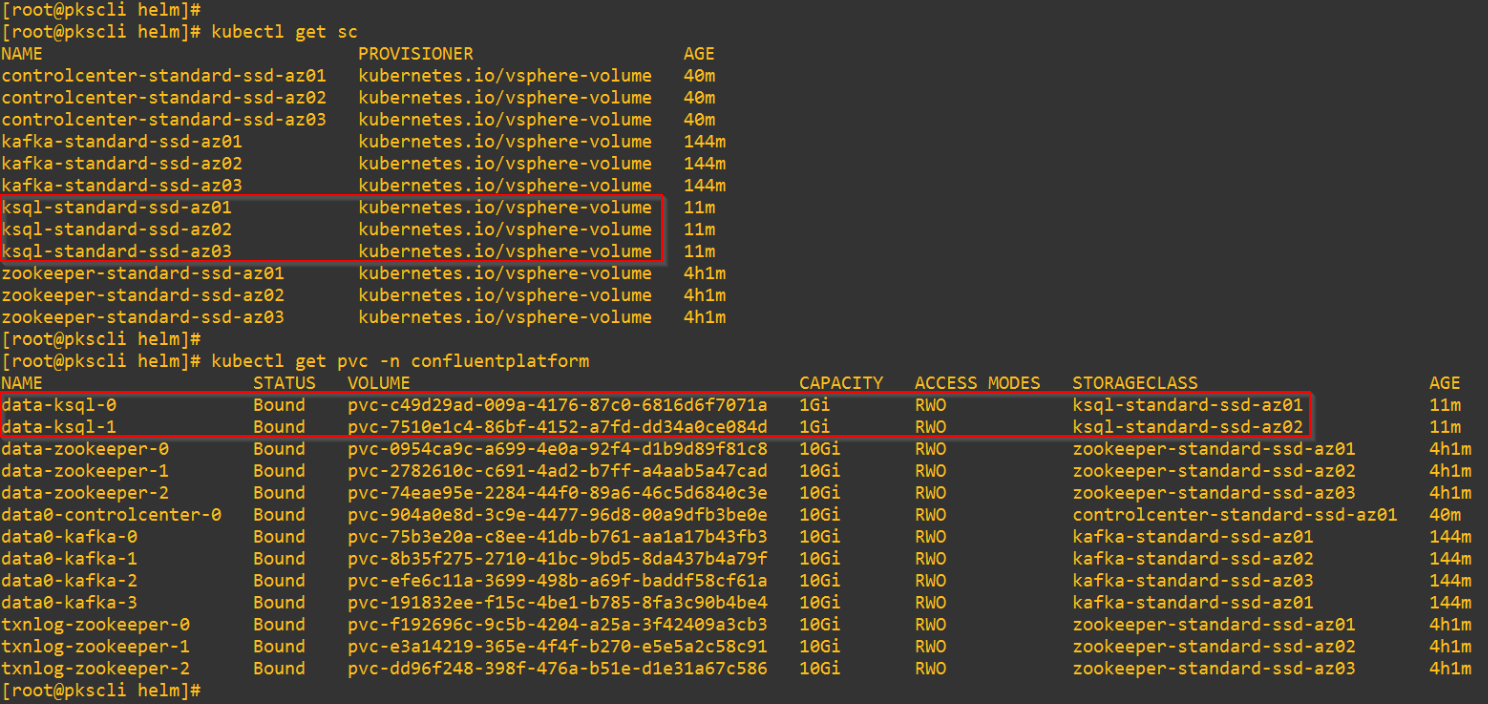
PVs are provisioned as vmdk files on the NFS datastore.
Validating Publish and Subscribe to Topics
On the PKS Admin VM, create and populate a file named kafka.properties with the below security details needed to access the cluster.


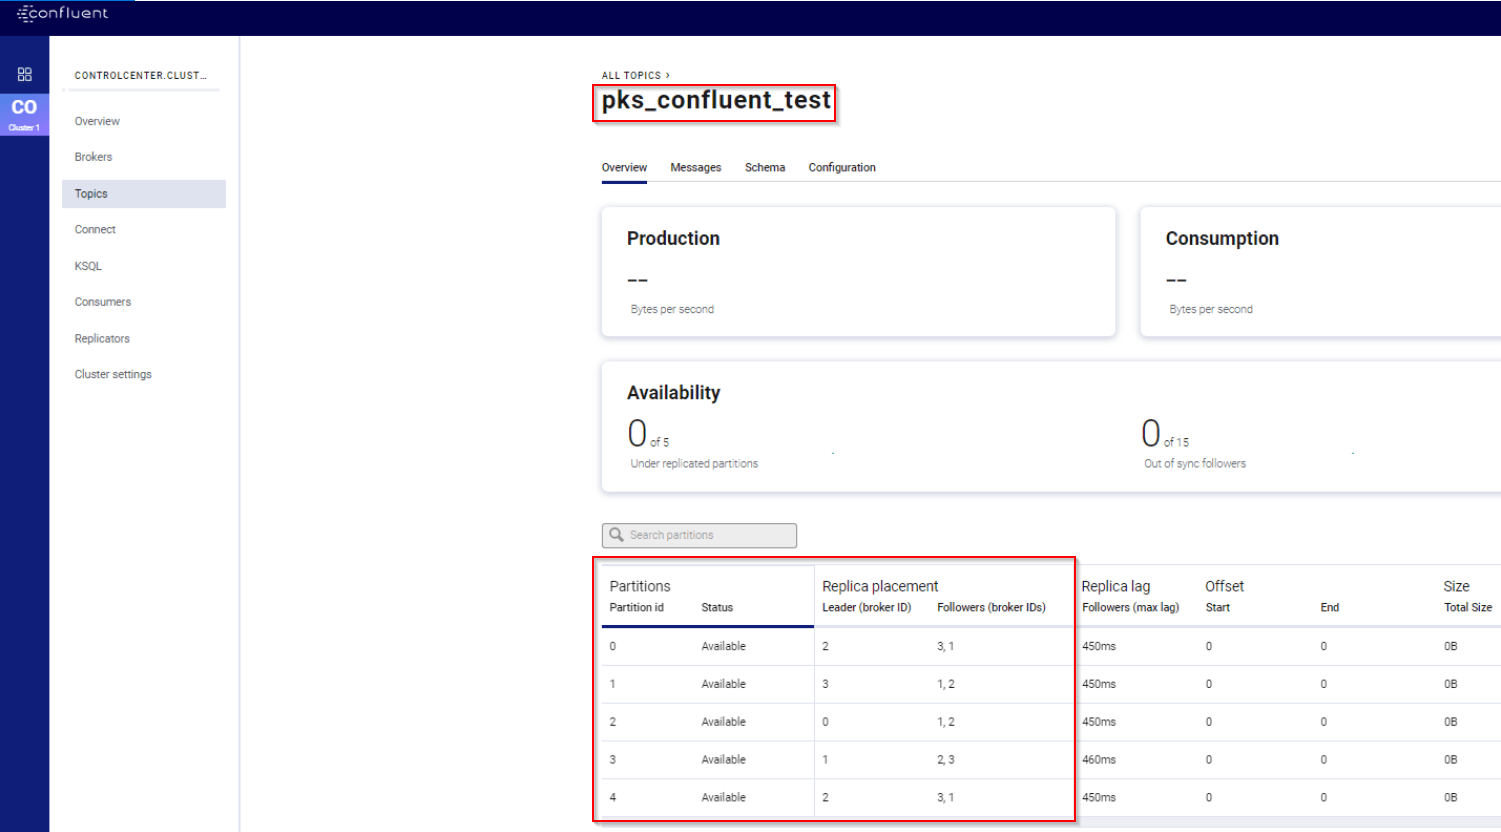
Let’s create a new Topic “pks_confluent_test” on the Broker Cluster with 5 partitions and replication factor of 3. Note that the bootstrap server mentioned is the NSX-T Loadbalancer VIP of the Broker cluster.

We should see the Topic, partition details and leader placements in the Control Center.
Let’s publish few messages using the Producer Data Gen tool available with the Confluent Platform. The below command generates 50 million messages, each with 100 bytes size with highest level of durability (acks=-1)
[Note: The high latency is introduced by the NFS datastore which is running on a virtualized hardware. This can be ignored]

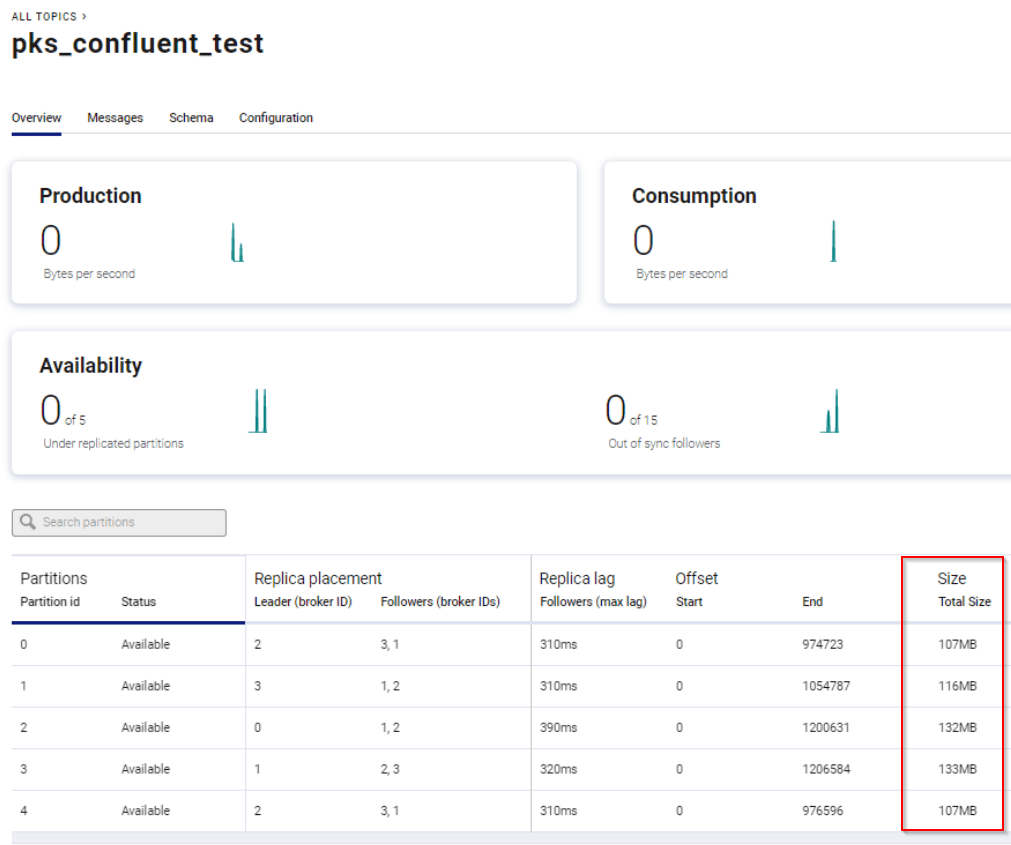
We should see messages ending up on the partitions evenly.
Let’s consume (subscribe) few messages using the Kafka Consumer tool available with the Confluent Platform.

The output shows the tool has successfully consumed 500051 messages (47.69 MB).
SUCCESS!!!
To summarize, NSX-T as the CNI simplifies many of the networking complexities related to the deployment of Confluent Platform. Each component gets an NSX-T Loadbalancer on the frontend for ingress access and SNAT rules for egress. We are able to achieve multitenancy at the network level with better visibility and control over the POD networking.
This concludes the two-part blog series. I hope this was informative.
Interested to read further? Here is the other part of the series:
